ODOO'S FUNCTION
Odoo's studio allows customizing approval process of Sales, Purchase, Accounting, etc. according to company policy.
CLUEDOO'S FUNCTION
Cluedoo adds additional features to personalize approval workflow by:
- Managing approval rules by groups and option to specify a hierarchical approval procedure
- Recording approval histories
- Adding a button to revoke the whole approval sequence
- Auto Confirm Action checkbox to automatically confirm the PO after the last approval
CREATE APPROVAL RULESThere are 2 ways to create Approval Rules:
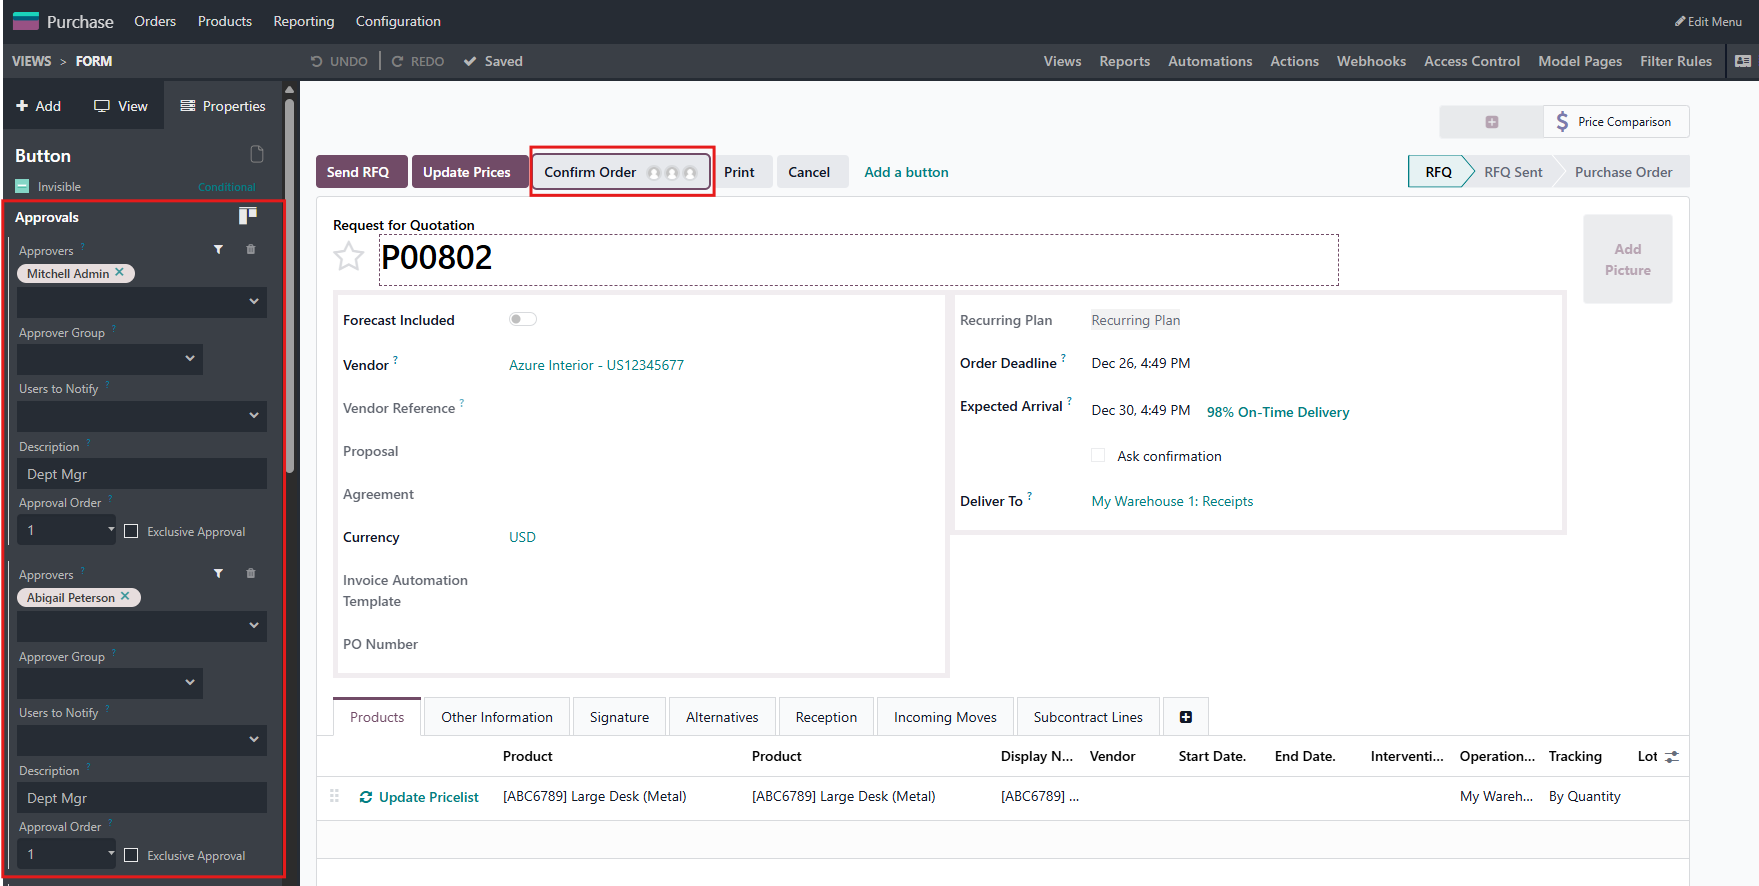
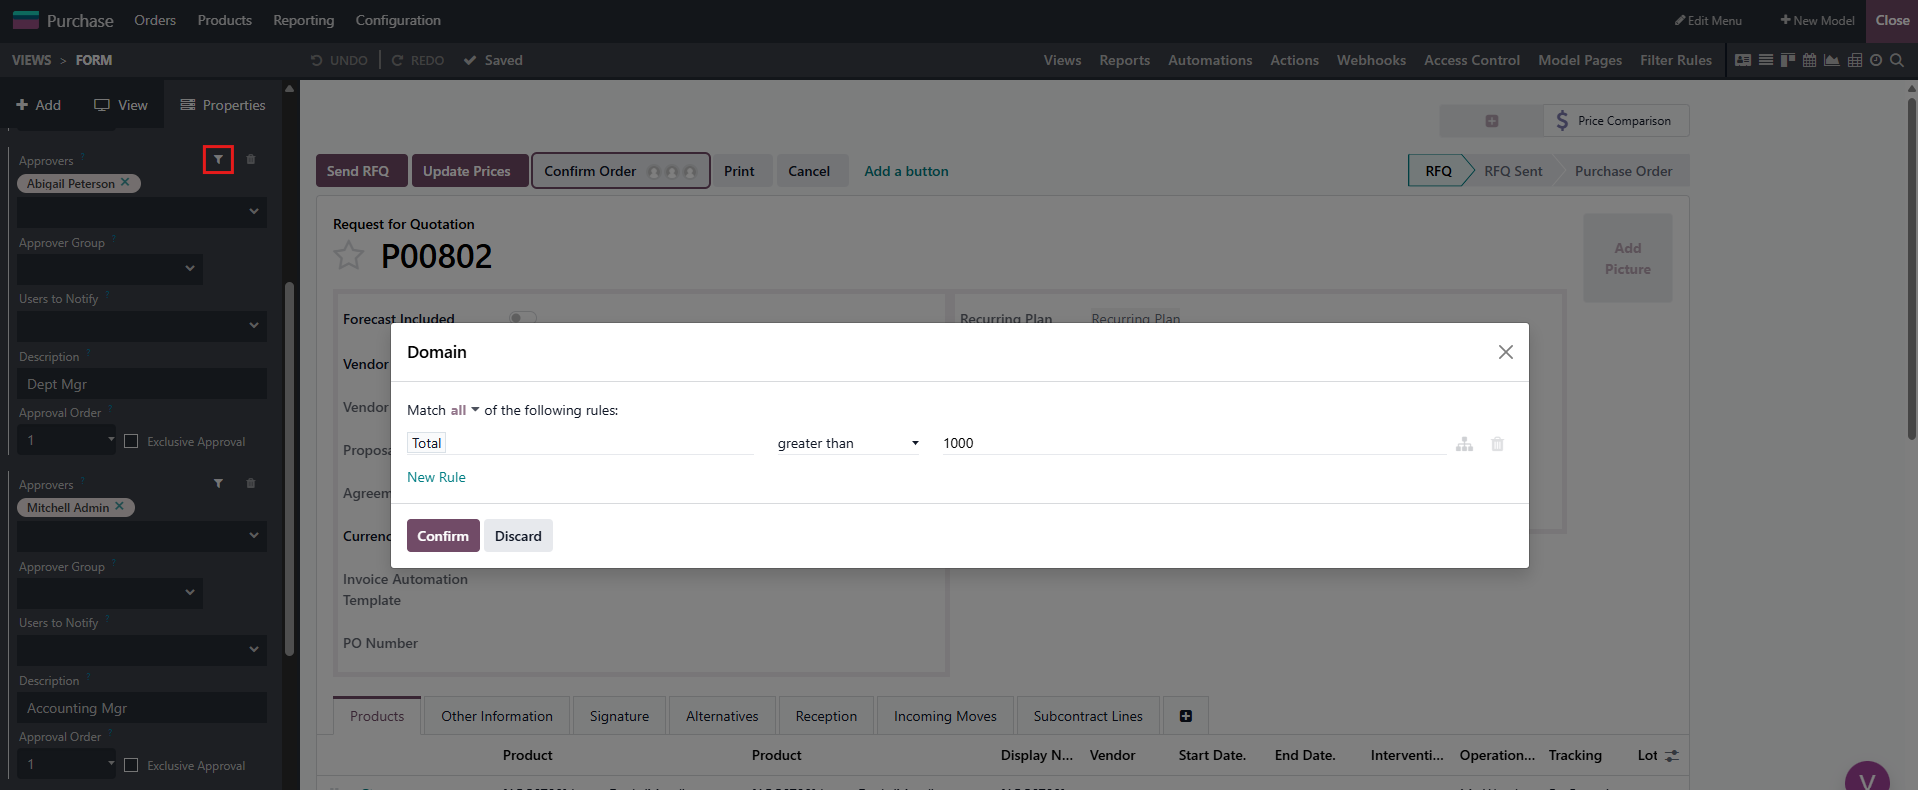
Option 1: By studio 1. Open an RFQ in studio, click on Confirm button to edit 2. Check "Set approval rules" checkbox 3. Select Approval Group and Responsible person for the Rule (note: Any users in the selected Approval Group can approve the rule, but only Responsible will be notified for the scheduled activities) 4. Add condition for the rule by clicking on the Funnel icon next to Approval Group box 5. Close Studio. | |
Option 2: By go to Studio Approval Rules User can also view/create new Approval Rules by activating developer mode, then go to Settings/Technical/Studio Approval Rules. | 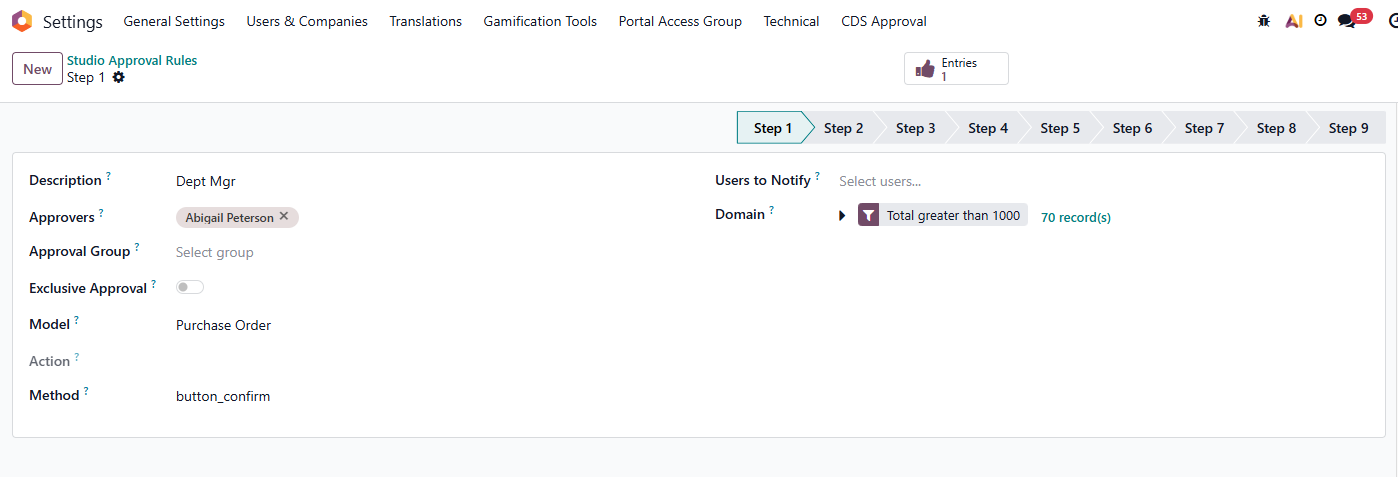 |
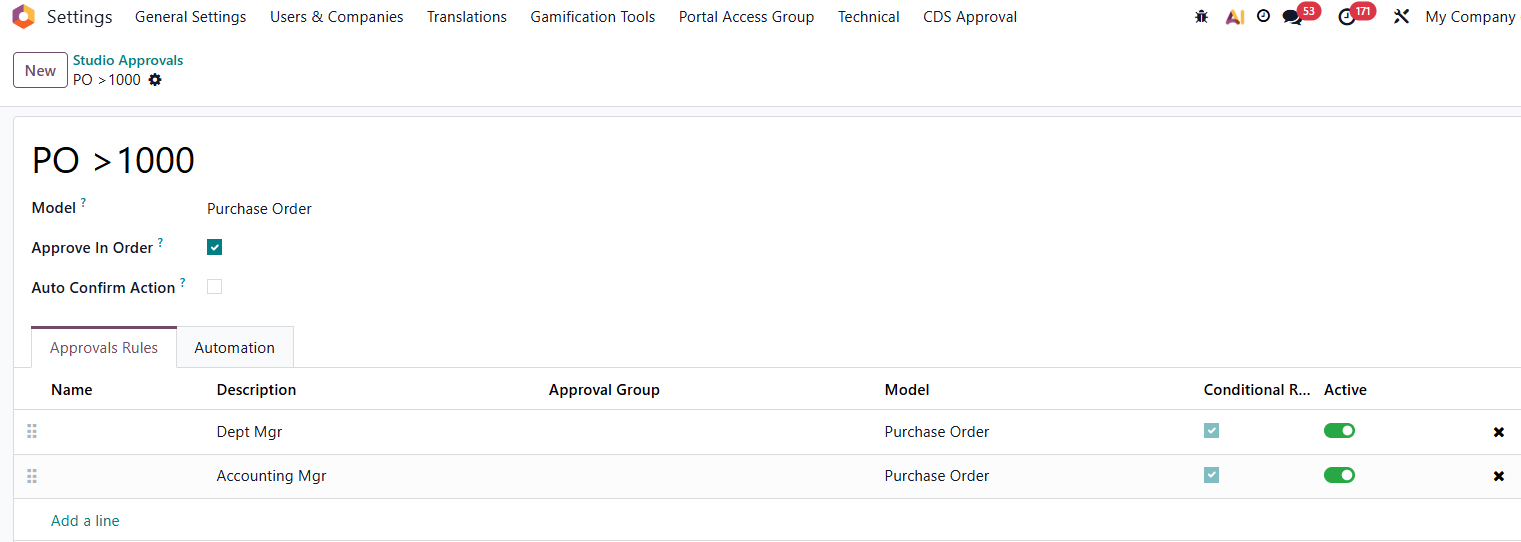
APPROVAL RULES GROUPTo group the rules created above Action: 1. Go to Settings/Technical/Studio Approval Rules Group, and create a new Group 2. Fill out Group name 3. Select Model (Sales Order, Purchase Order, etc.) 4. Add a line to select the created rules to the Group. Popup wizard will suggest rules related to the selected model only. 5. "Approve in Order" check box: - If not checked, approvals can be done in any order. - If checked, approvals need to be done in chronological order, from the top to bottom rules in the list. (For example, Accounting Mgr. cannot approve before Dept Mgr. approves) | 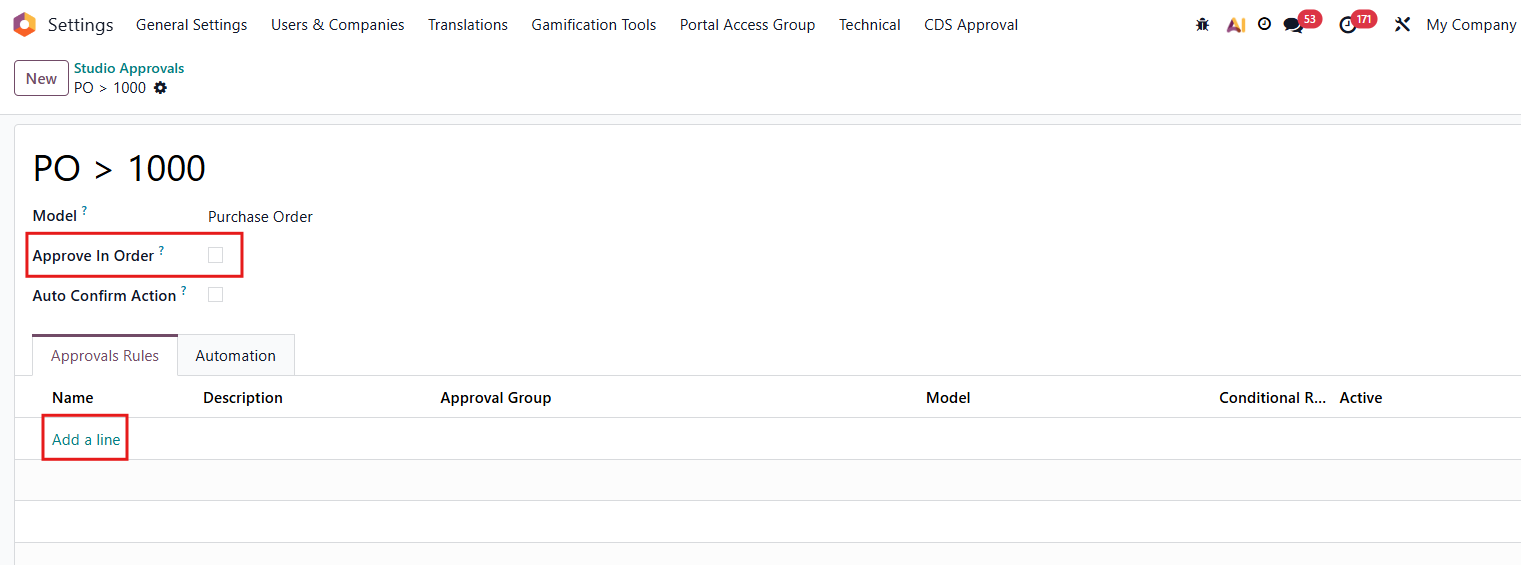 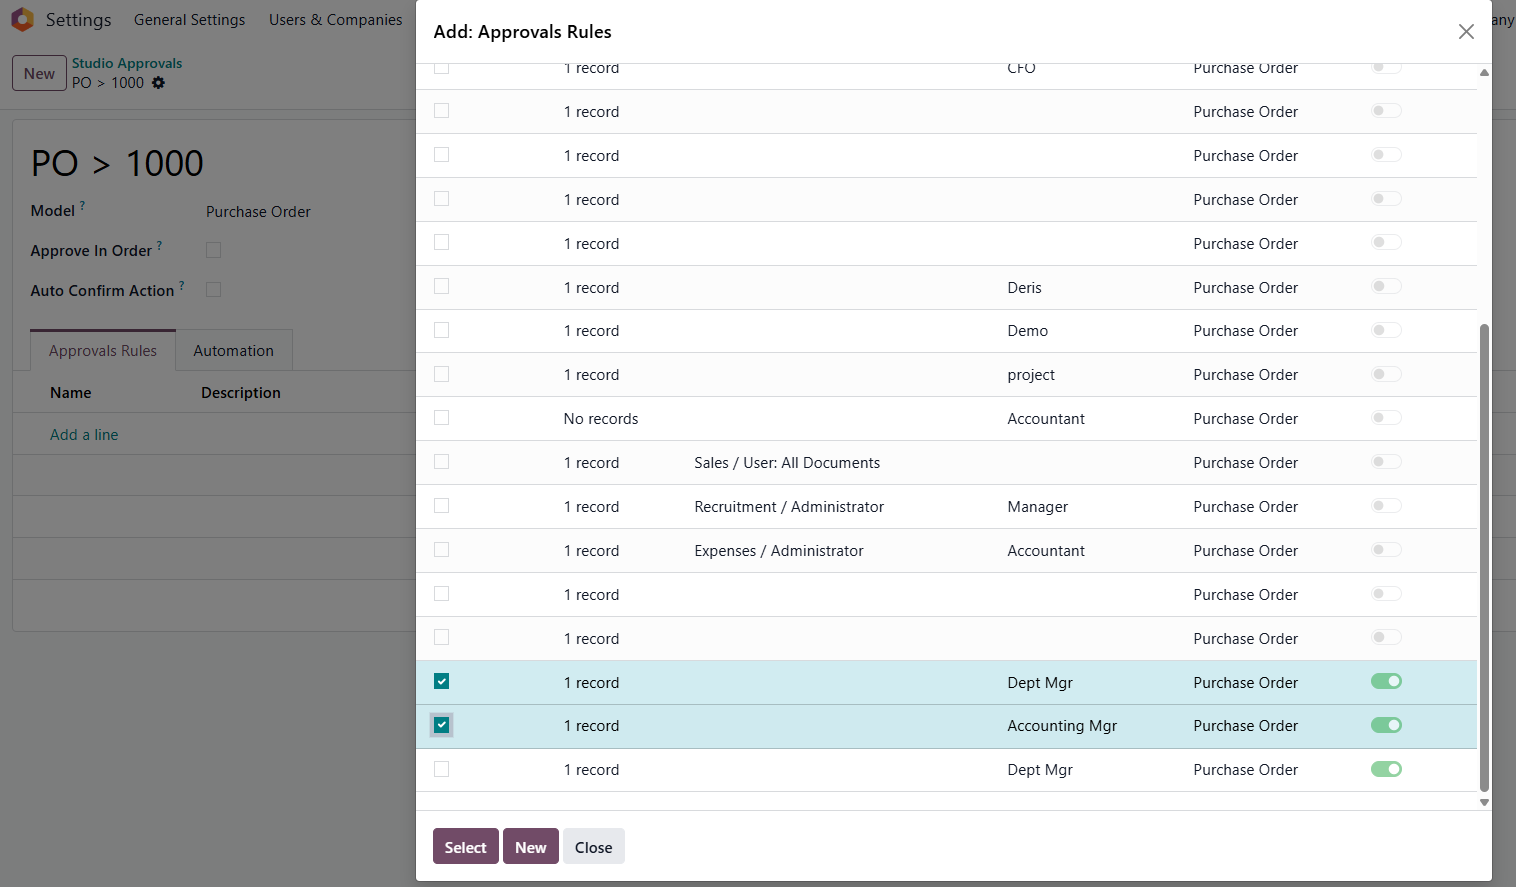 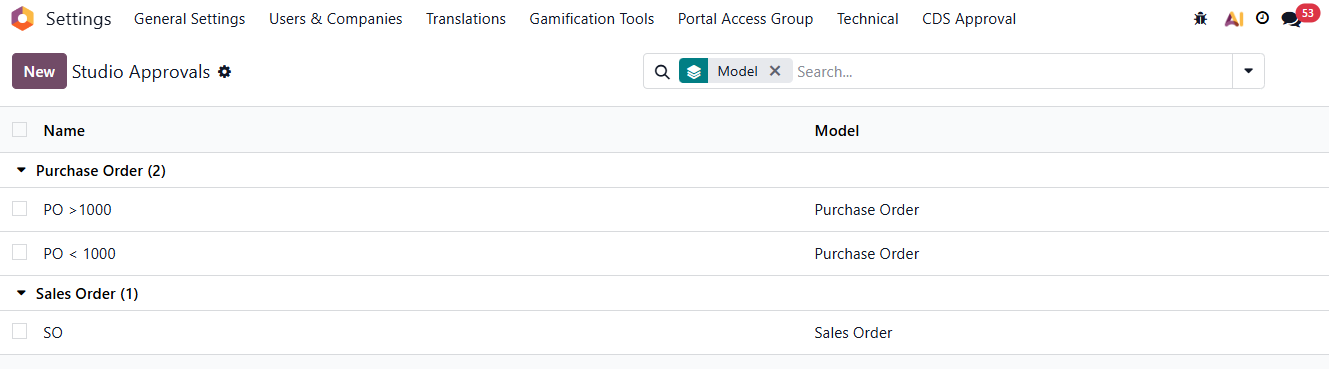 |
Note: User can change the order by dragging the arrow handle next to the rules. | 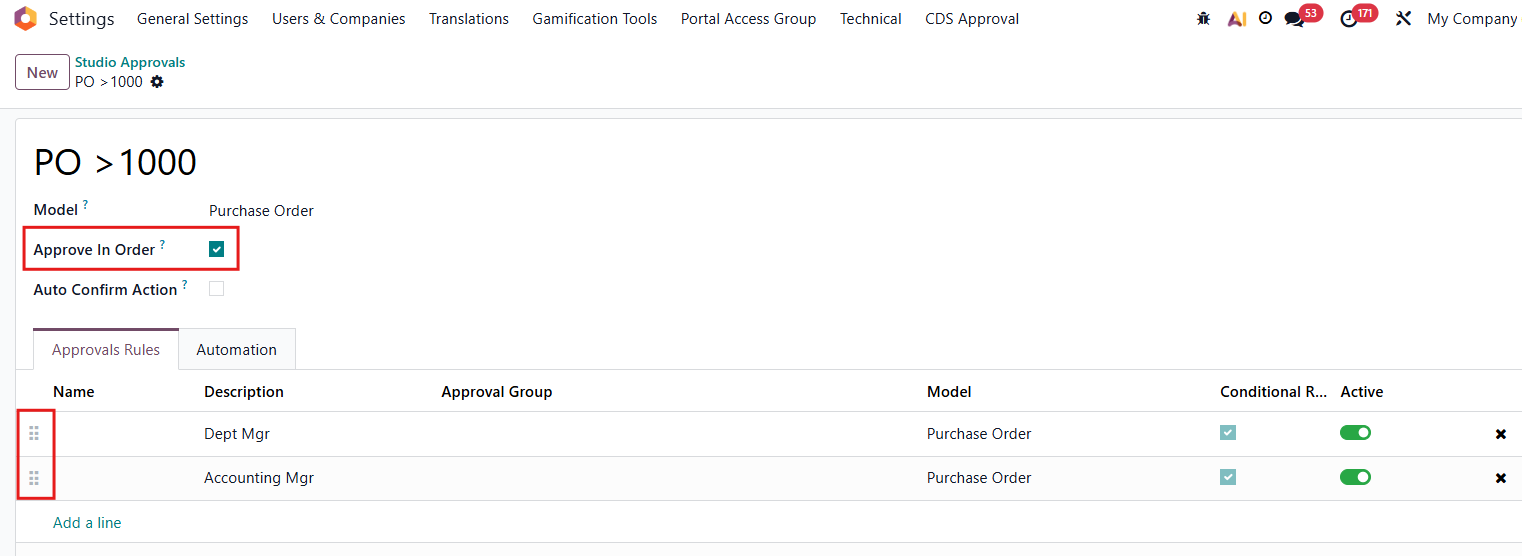 |
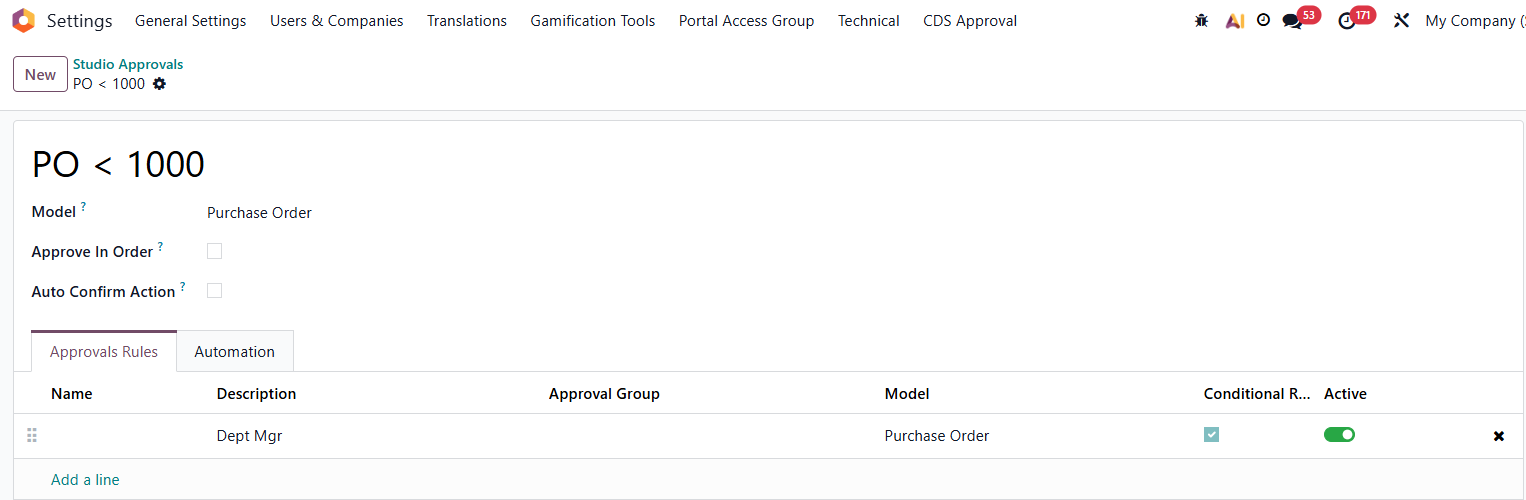
Result: Now that 2 Approval Rules Groups were created: - Purchase > 1000 - Purchase < 1000 | |
REVOKE ALL APPROVALSAction: 1. Go to Settings/Uses & Companies/Groups, choose "Can Reset Approval" group. 2. "Add a line" to assign user capable of revoking all approvals of an RFQ/Quotation/Payment request, etc. | 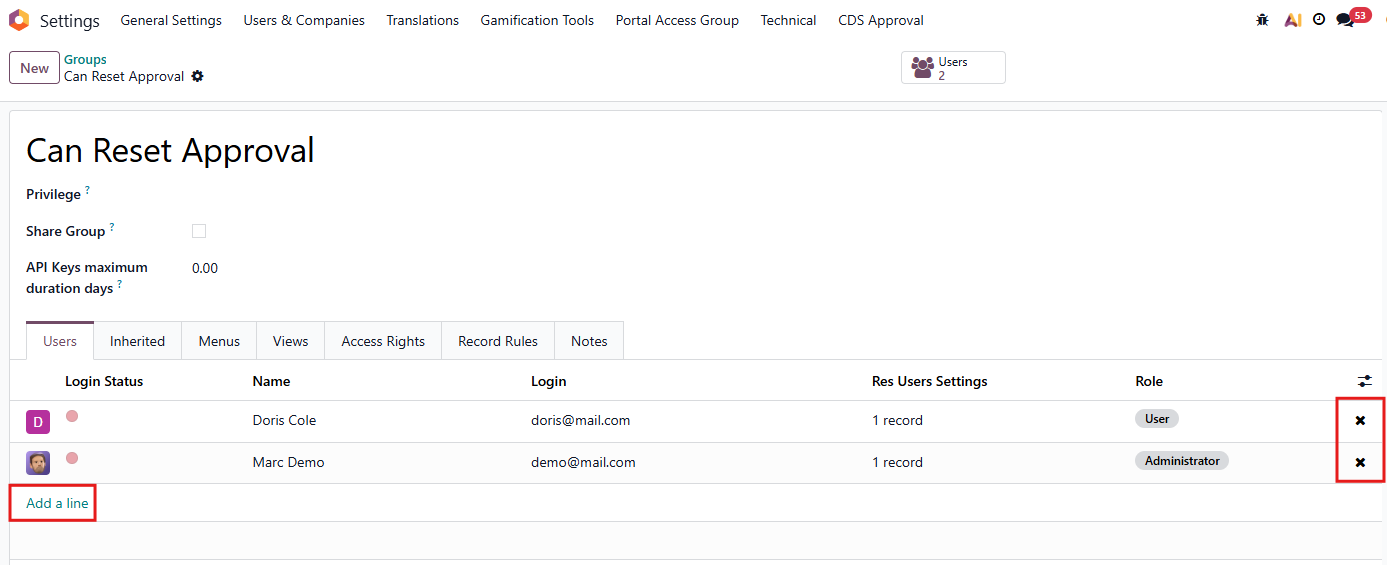 |
Result: On approval table, the assigned user can click on the Red button to revoke all approval process. | 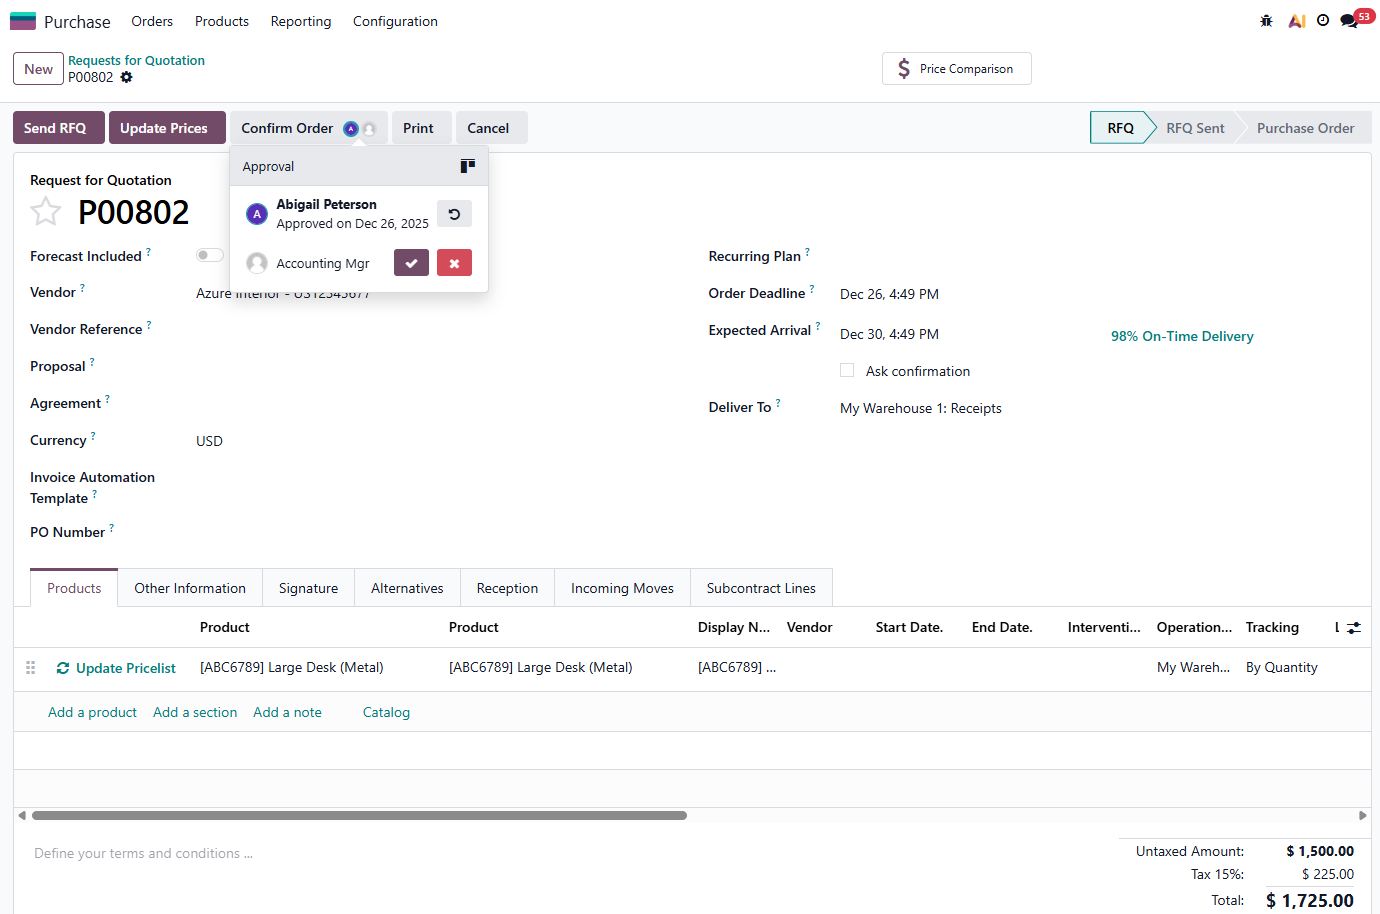 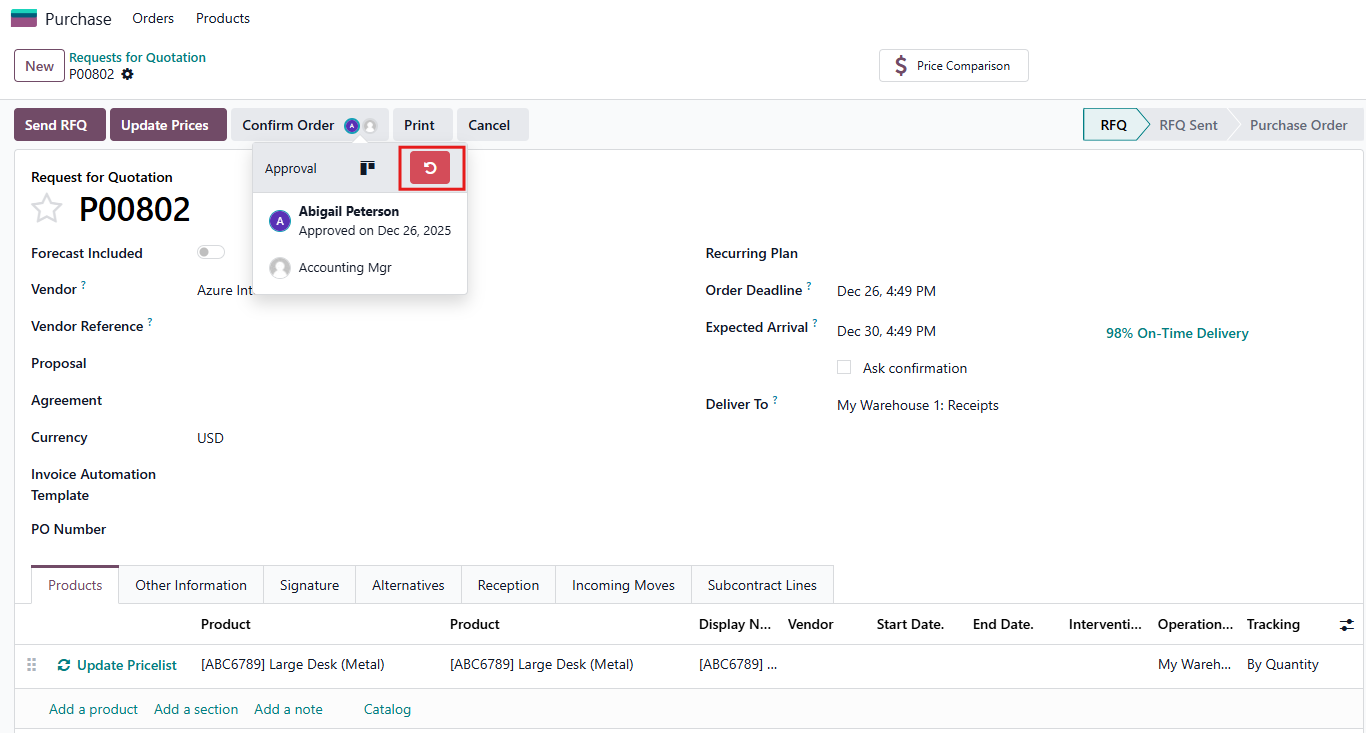 |
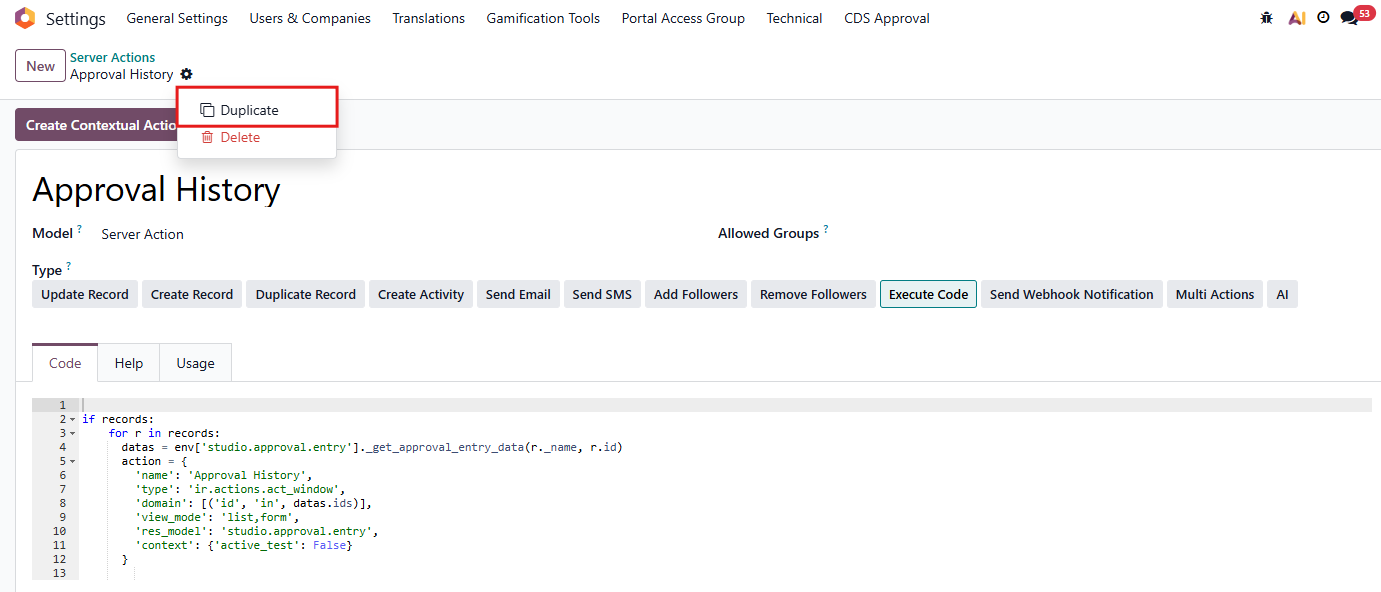
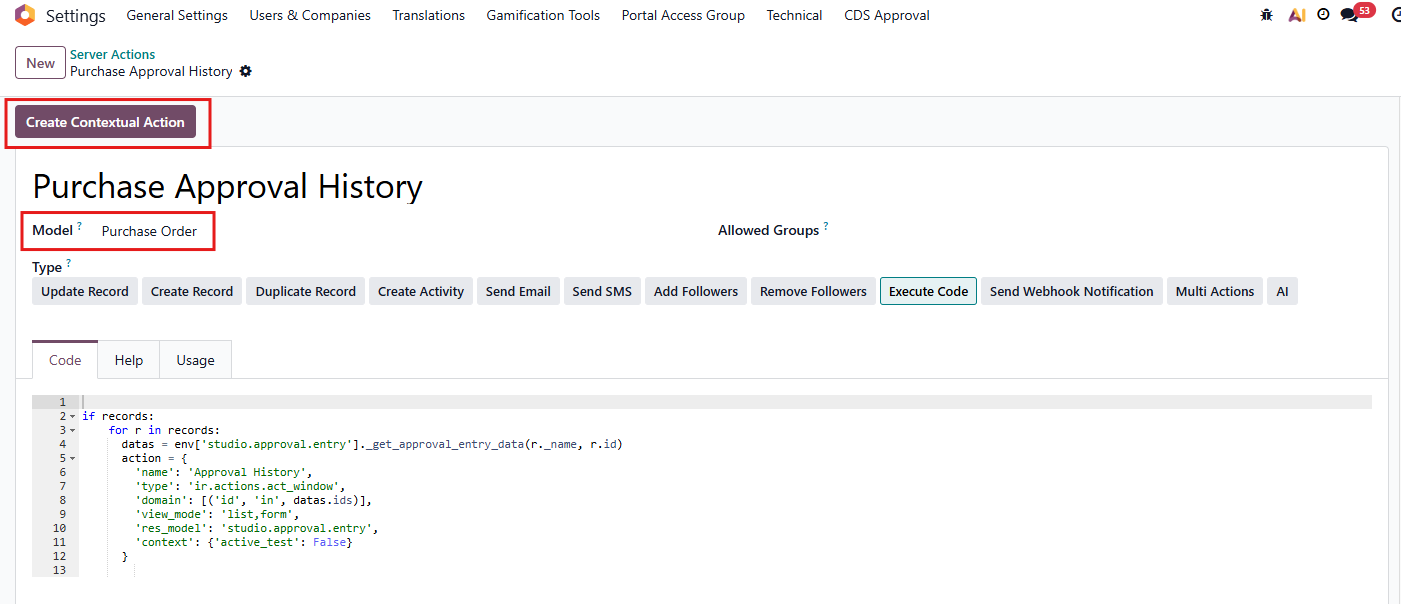
APPROVAL HISTORYTo create an action to view approval history of a Sales Order, Purchase Order, etc. Action: 1. Go to Settings/Technical/Server Actions, 2. Search for and choose "Approval History" 3. Duplicate 4. Fill out new action name, for example: Purchase Approval History 5. Choose model Purchase Order 6. Click "Create Contextual Action" to create the new action on Purchase Order form. | |
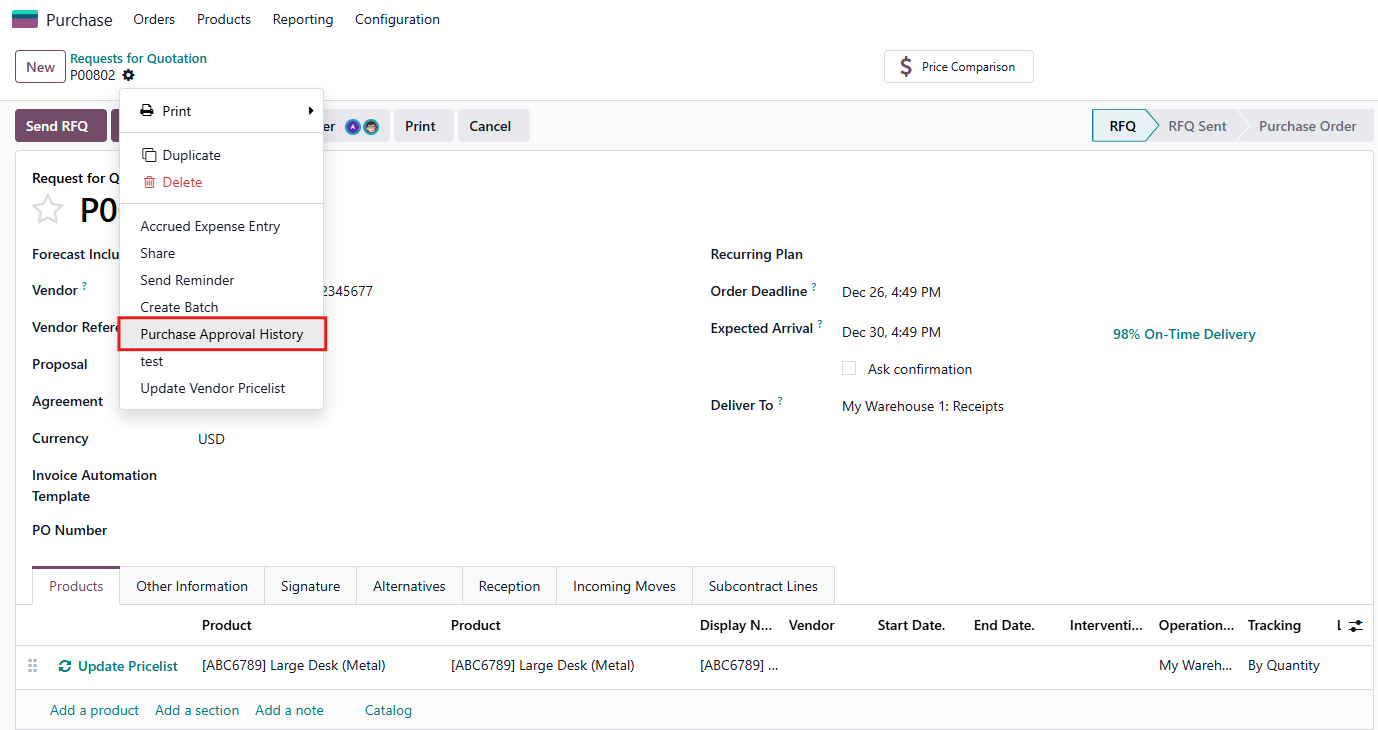
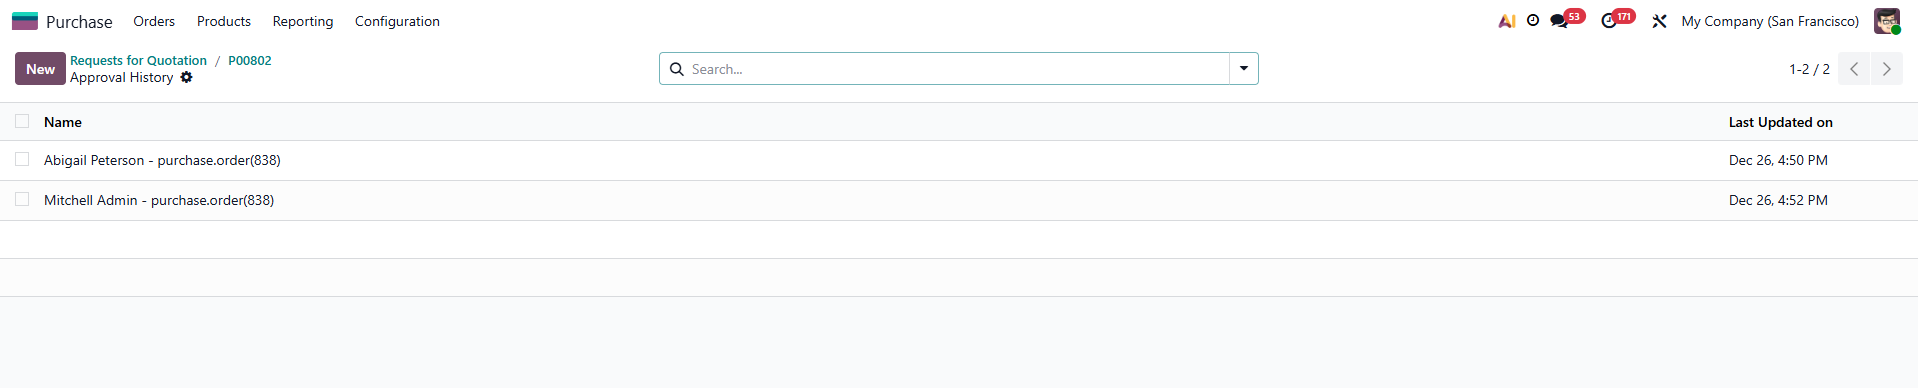
Result: User cam view approval history of an RFQ by clicking on Action/Purchase Order History | |
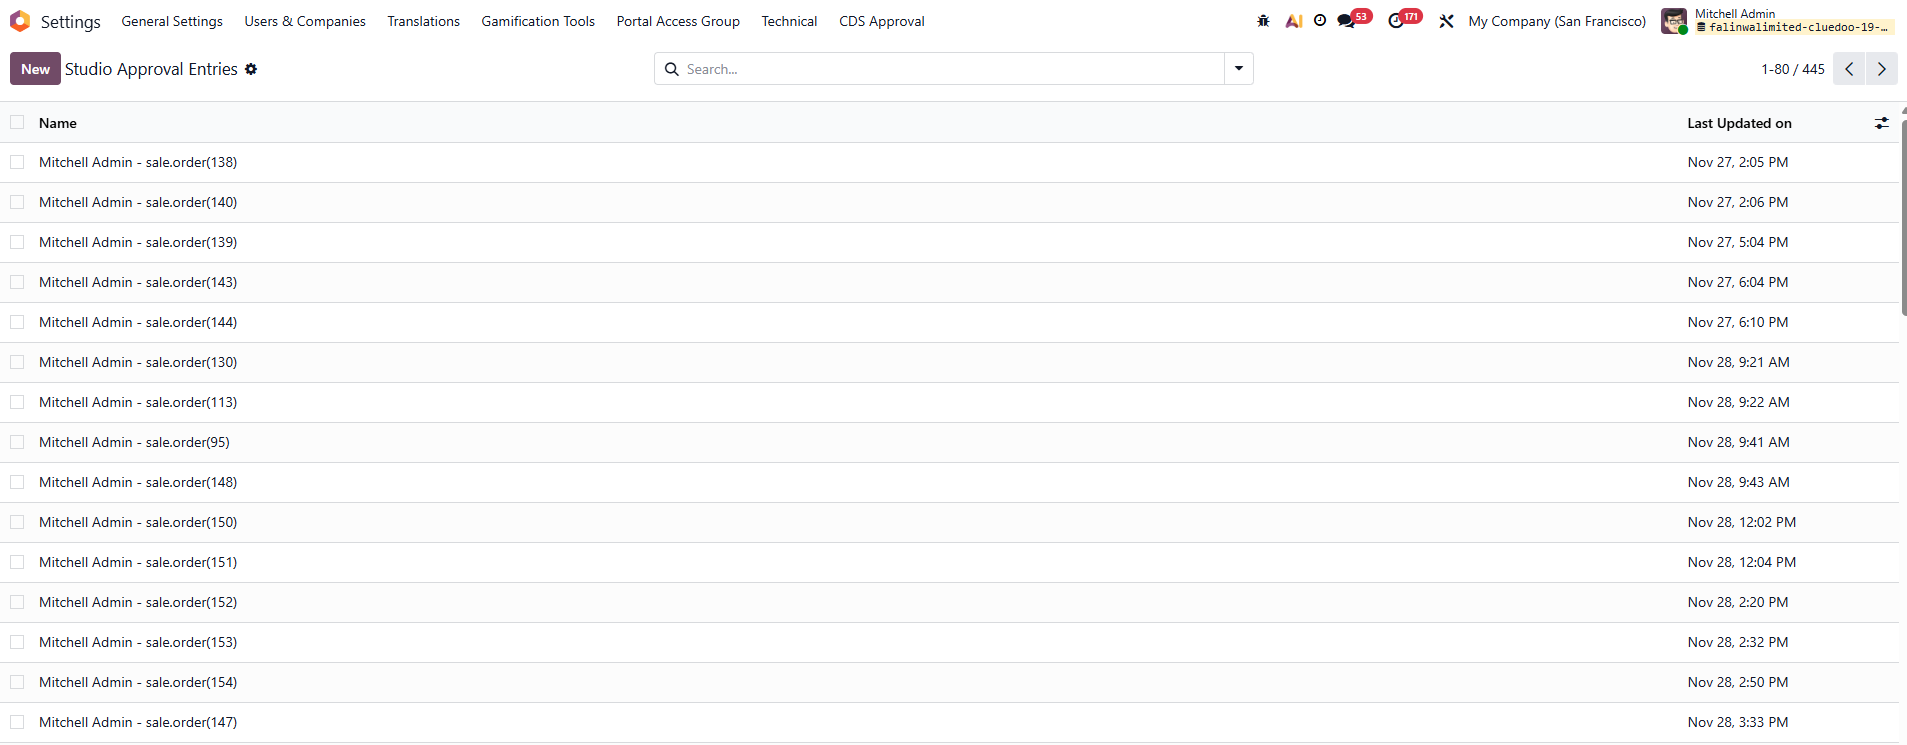
User can also view all approval entries of all models (Sales Order, Purchase Order, etc.) by go to Settings/Technical/Studio Approval Entries. | |
AUTOMATION TAB ON STUDIO APPROVALS RULES GROUP1. Go to Settings > Technical > User Interface > Studio Approvals Rules Group > Create a new group e.g. Purchase Approval Process |  |
2. Go to Settings > Technical > Automation > Automation Rules > Create a new rule and select the approval rule group that we just created in step 1 > Save |  |
3. Go back to the approval rule group > Under the Automation tab, the automation rule has been automatically added |  |
You can add Automation Rules from any models. |  |
"AUTO CONFIRM ACTION" CHECKBOXIn the Studio Approvals Rules Group, there is an Auto Confirm Action checkbox |  |
Result:
|  |