

ODOO'S FUNCTION
In Odoo, when creating a backorder, users have no option to directly create in the Transfer, make it becomes time-consuming and difficult to navigate in the wizard
CLUEDOO'S FUNCTION
CLuedoo allows users to input quantity to backorder directly through Wizard, or mass input quantities to backorders through export/import, making it easier to manage and update in bulk. Morover, CLuedoo also extends the package wizard in stock.picking to support backorder creation, making it easier to copy and paste backorder data directly from Excel into Odoo.
1. Create a Purchase Order with multiple products > Confirm PO > Click Receipt smart button | 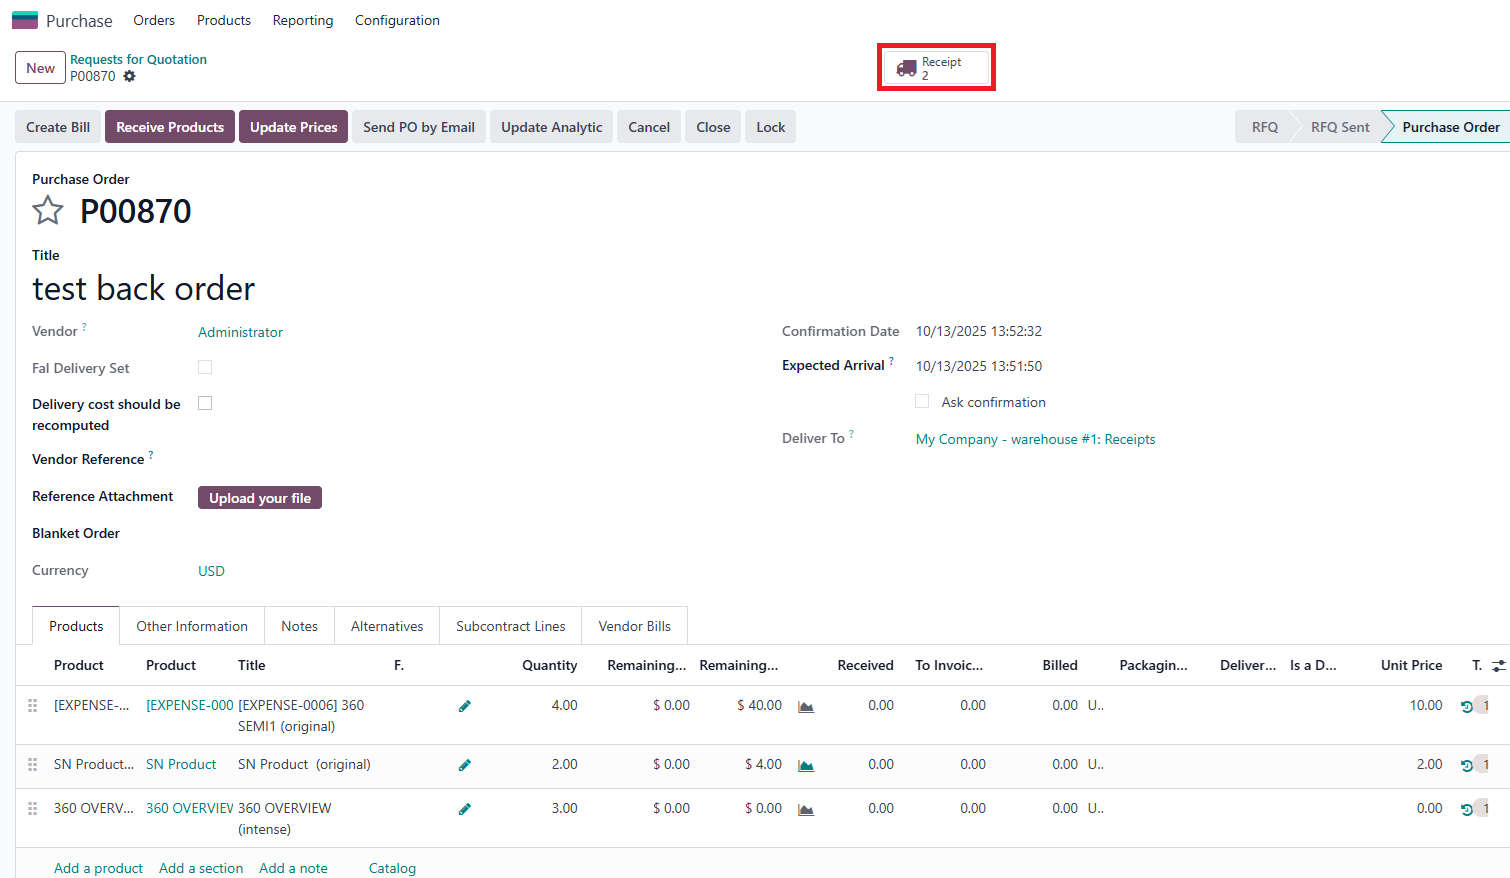 |
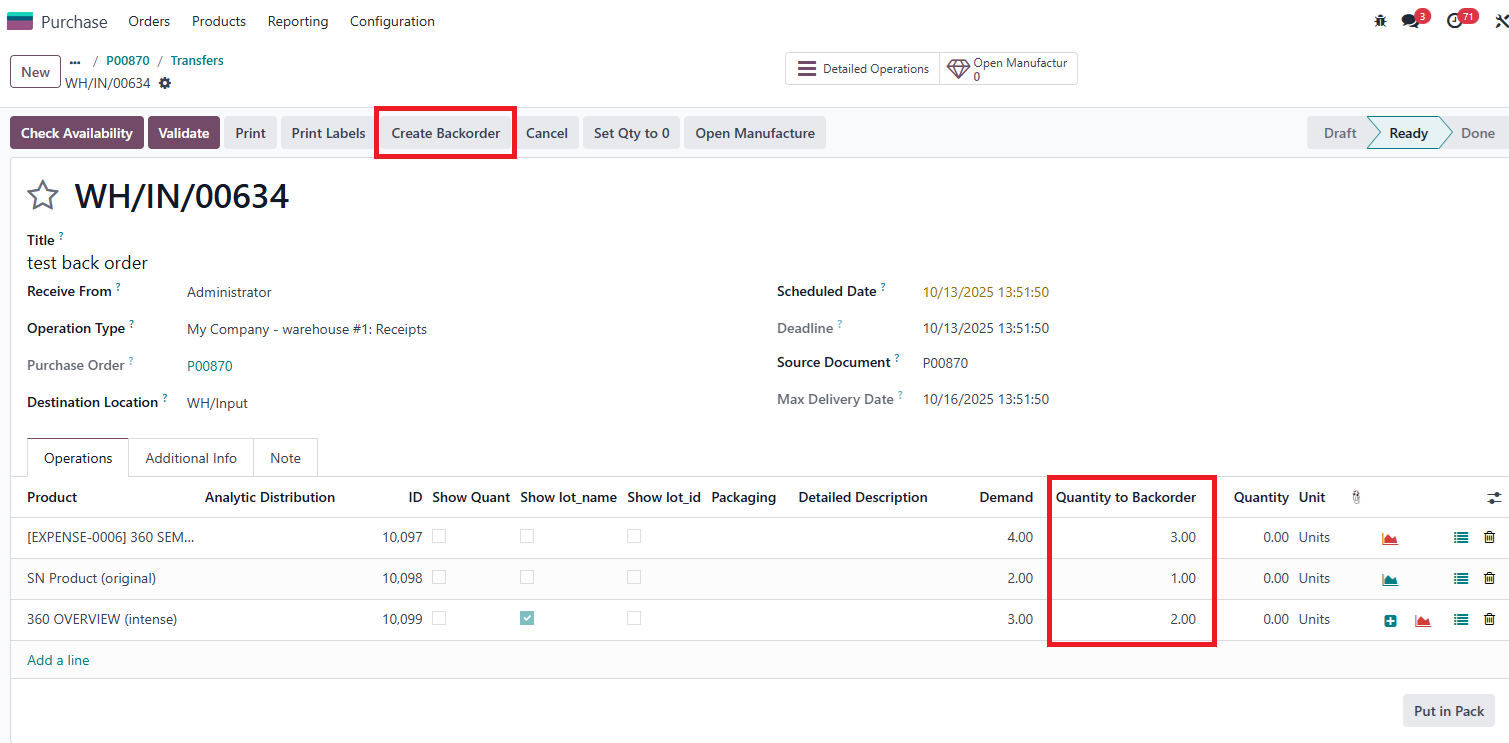
2. Click on the Create Backorder button and input the Backorder quantity in the Wizard > Click Create Backorder | 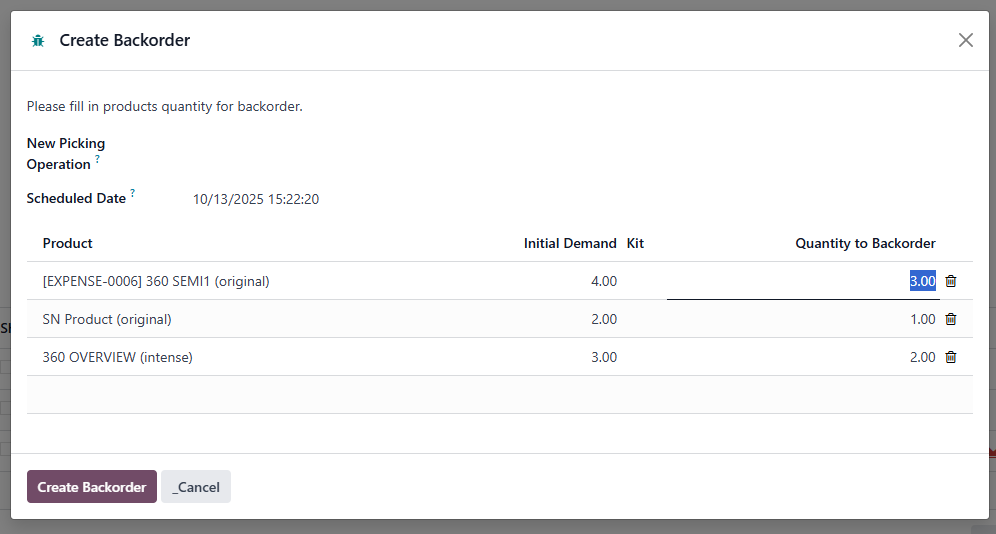 |
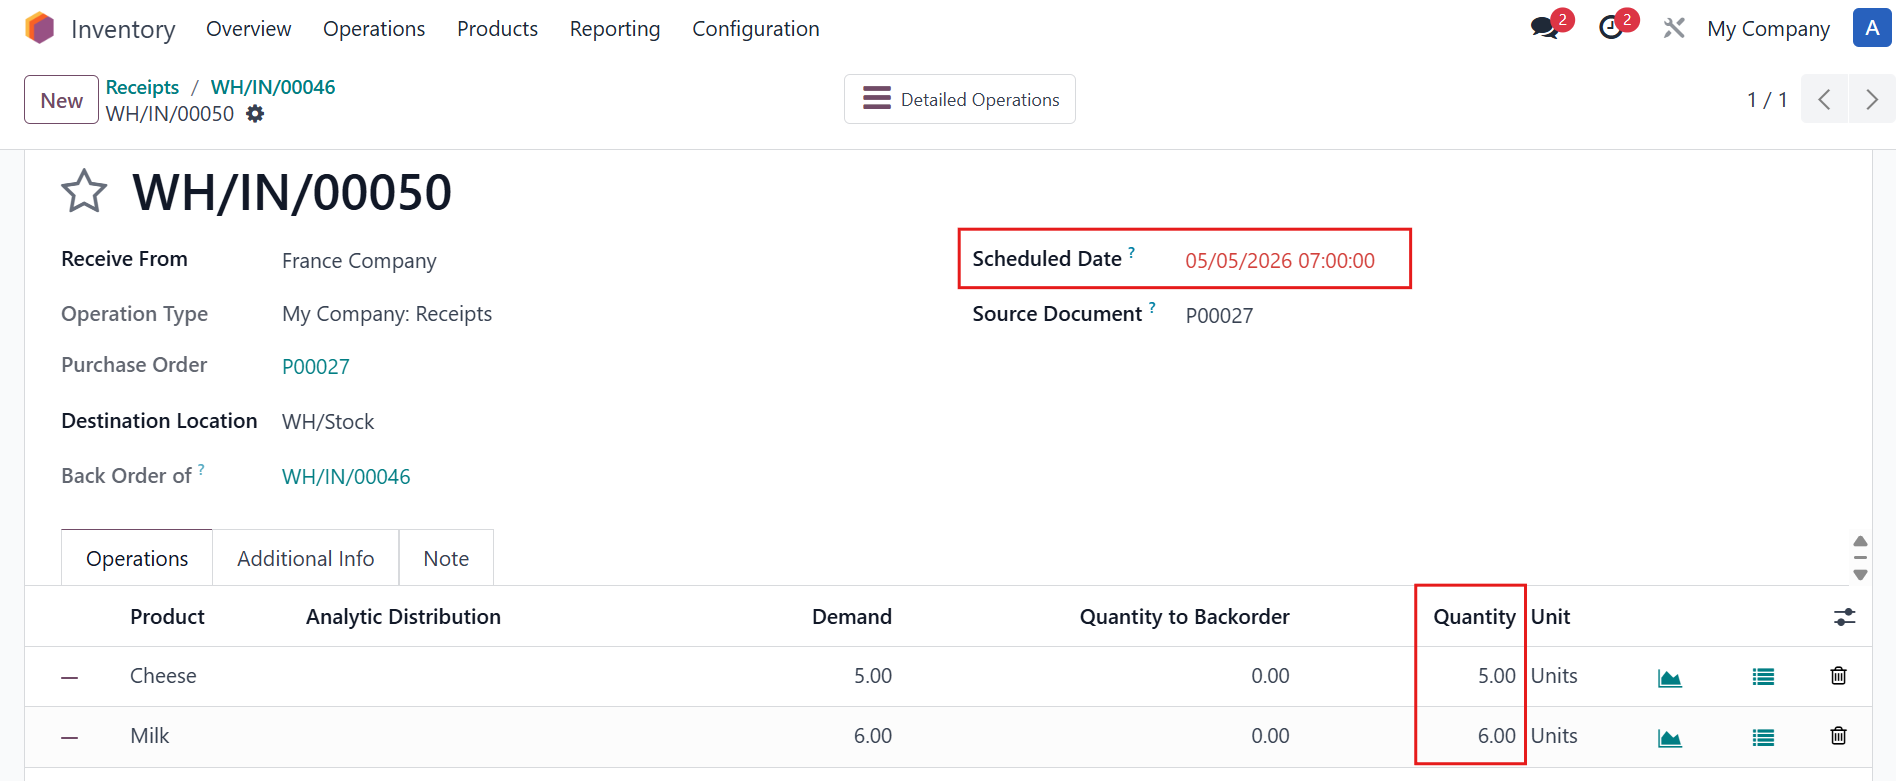
3. The new Backorder has been created, you can find its number in the chatter The Quantity of the current (original transfer) is also updated |  |
Result: |
|
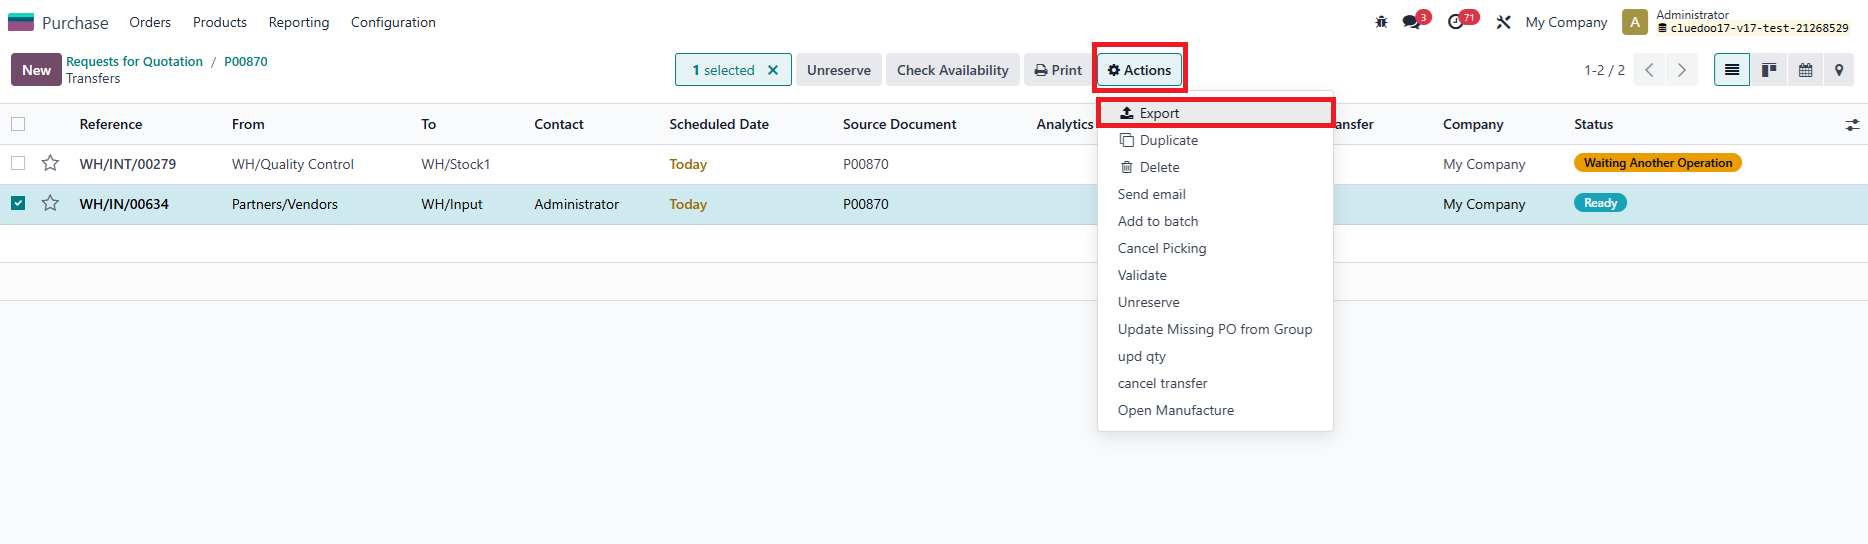
Mass Import Backorder Quantity 1. Select the Transfer and click on the Actions button > Export |
|
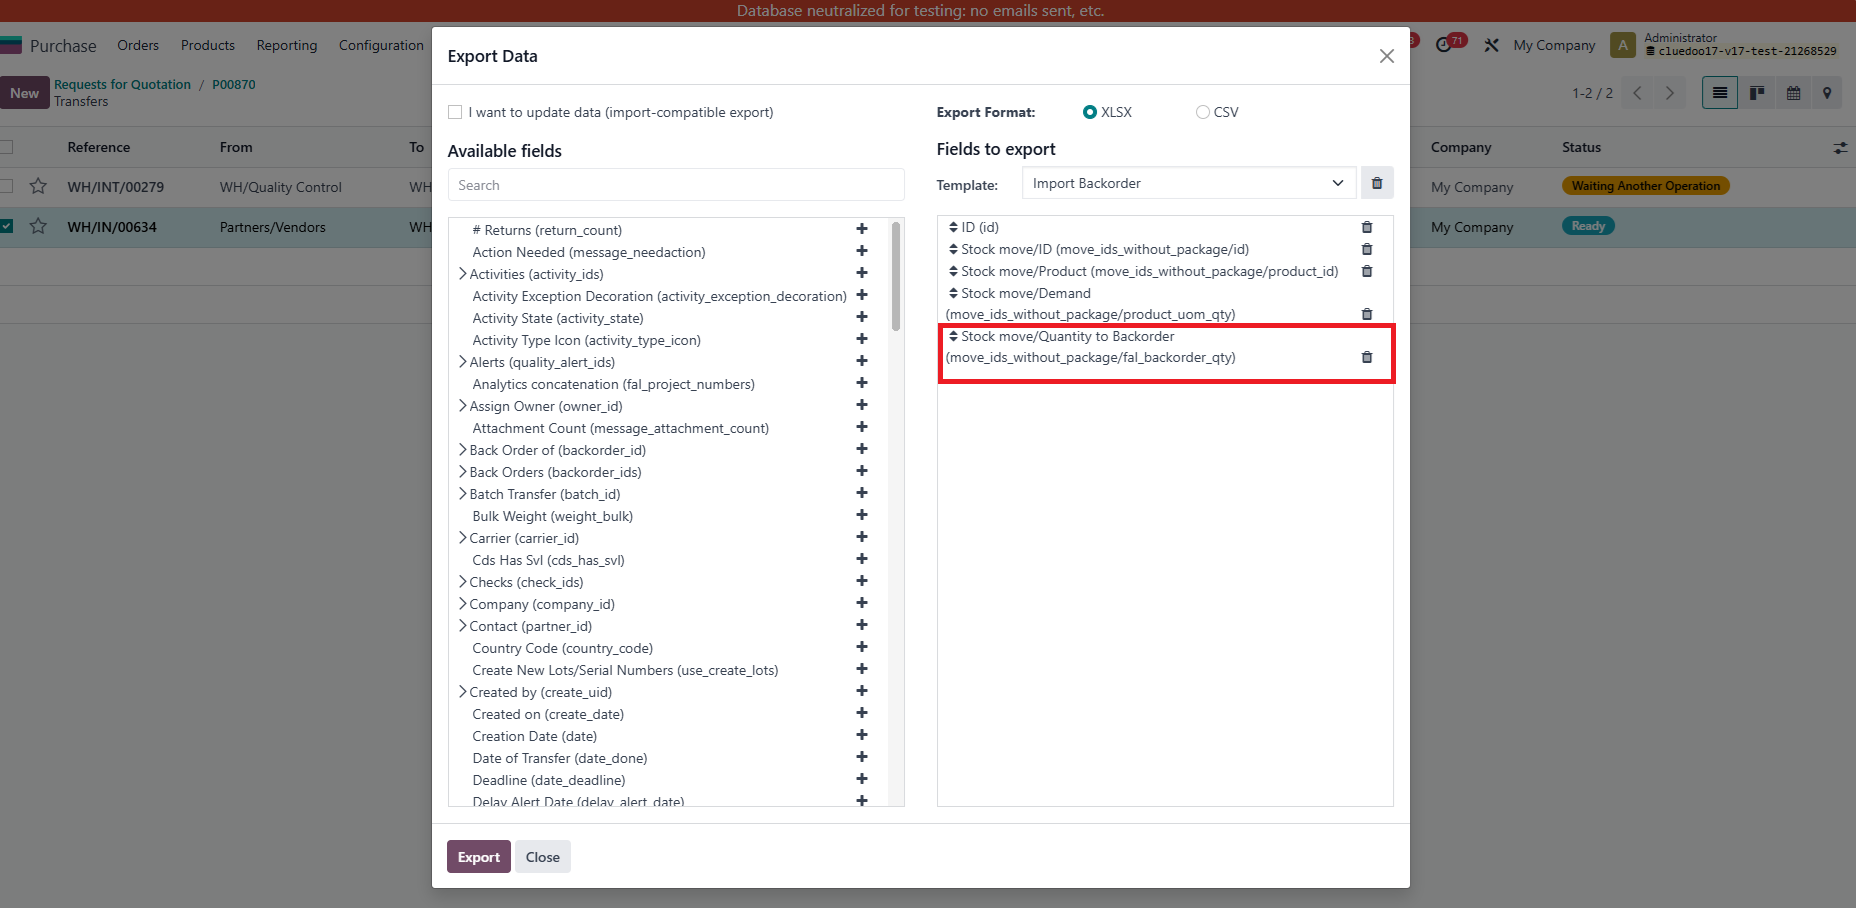
2. Create a new export template or use your existing one but add in new field Stock move/Quantity to Backorder (move_ids_without_package/fal_)backorder_qty) Click Export |
|
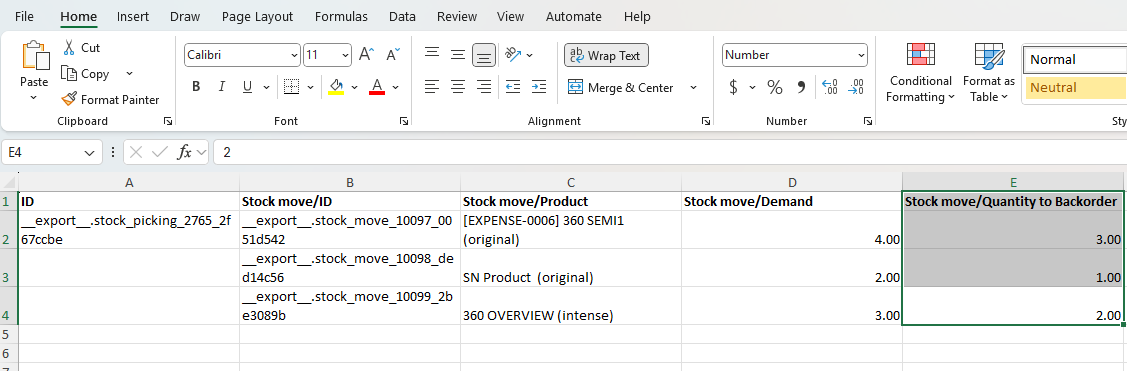
3. In the downloaded Excel file report, input the quantity to Back order |
|
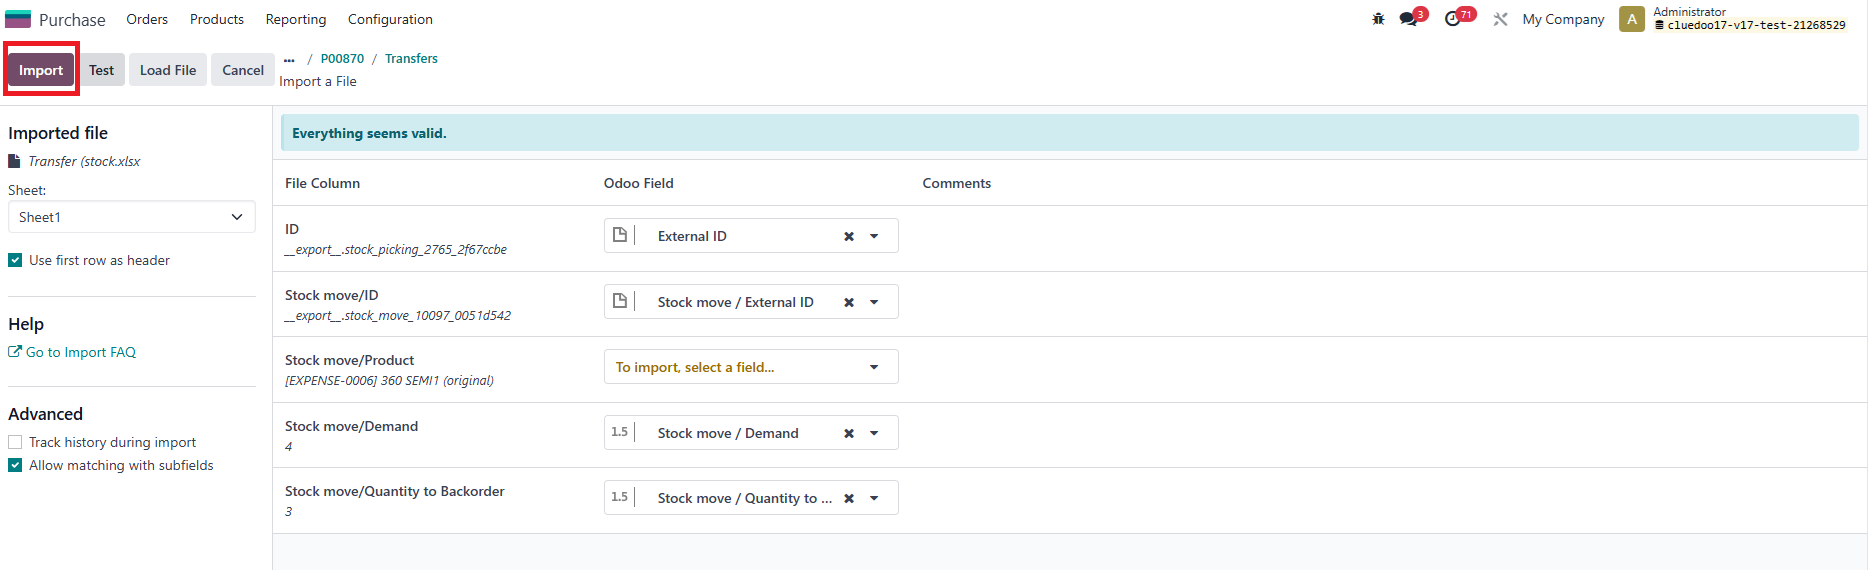
4. Back to Receipt > Import records > Upload the edited Excel file > Import |
|
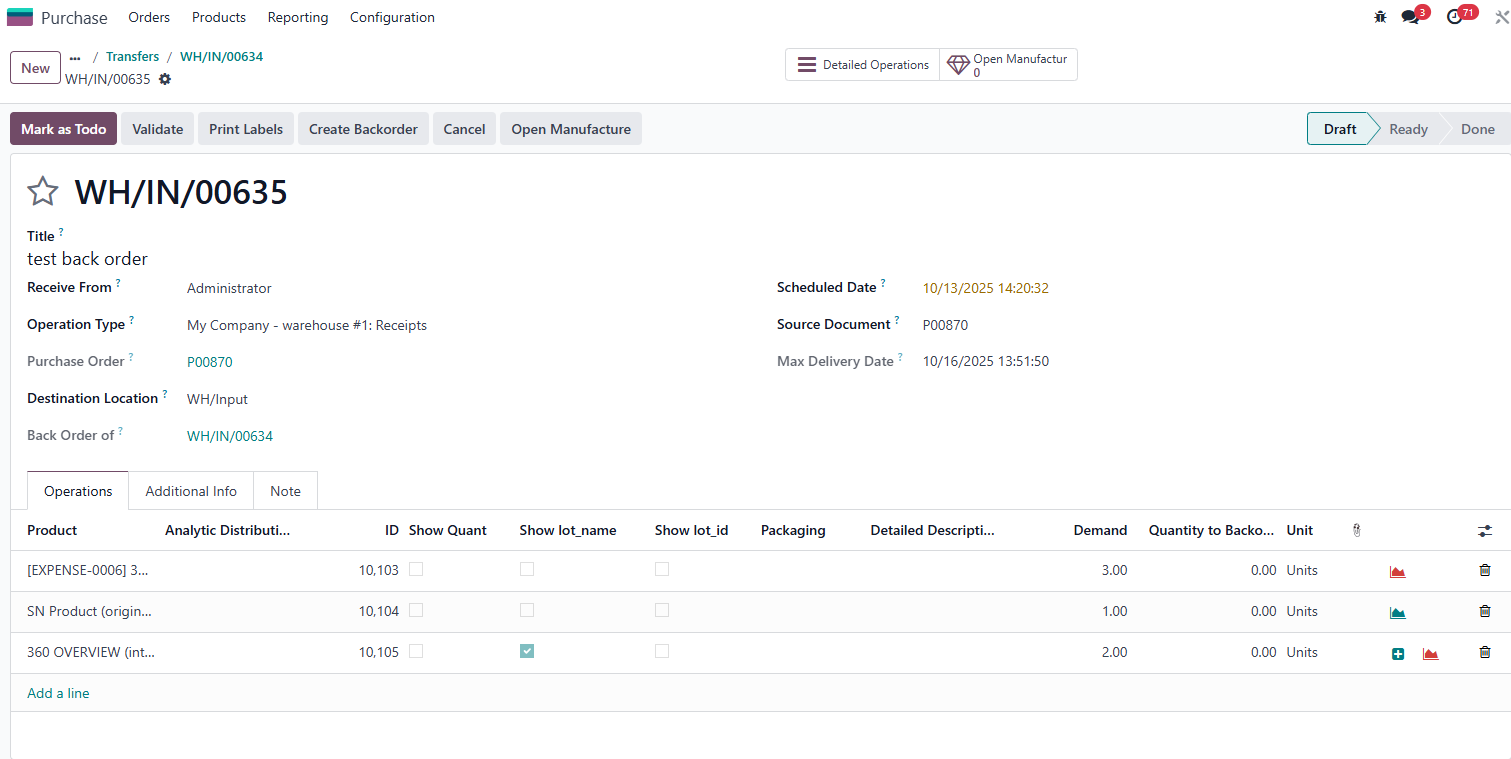
5. You can see all the Quantity to Backorder is now filled > Click on Create Backorder |
|
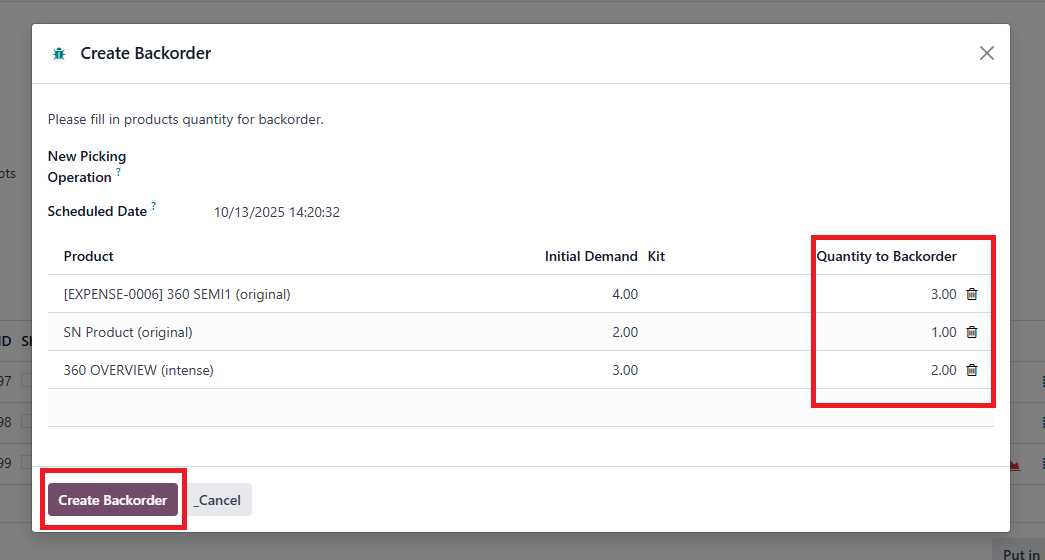
6. In the wizard, the Quantity to Backorder is also filled > Click on Create Backorder |
|
7. The new Backorder has been created, you can find its number in the chatter The Quantity of the current (original transfer) is also updated |
|
Result: |
|
COPY THE CONTENT OF A BACKORDER FROM EXCEL TO ODOO | |
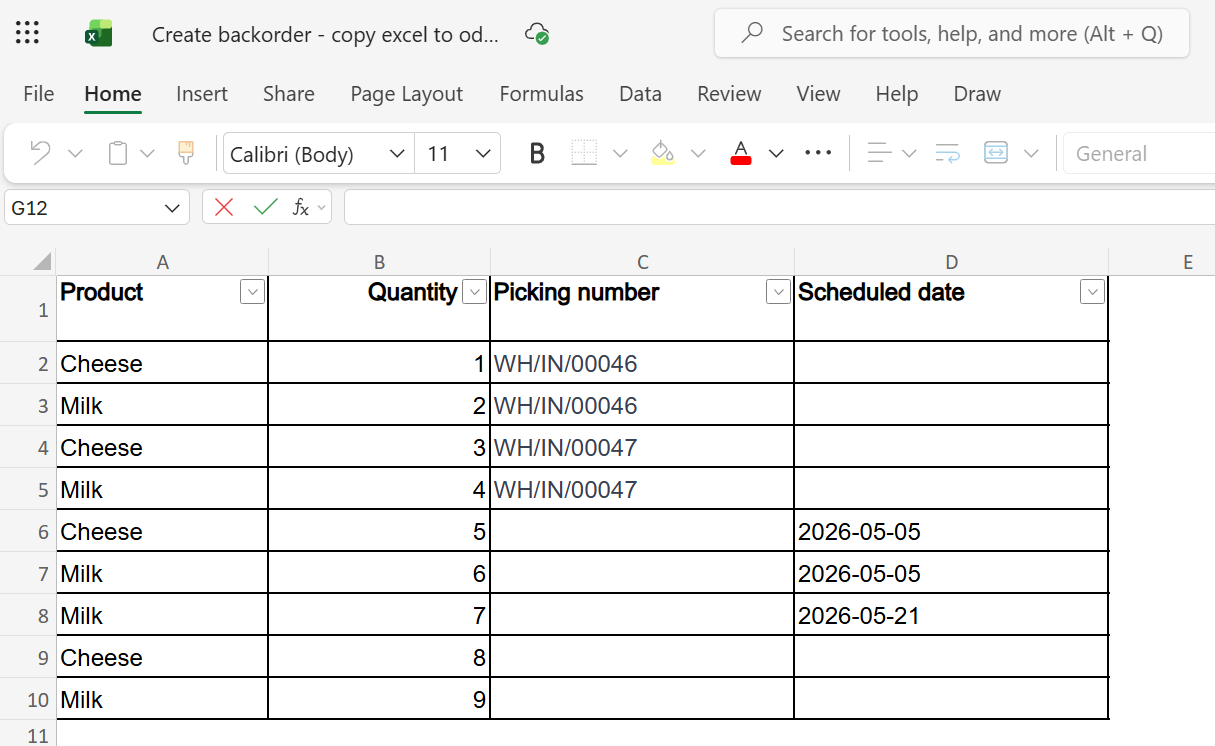
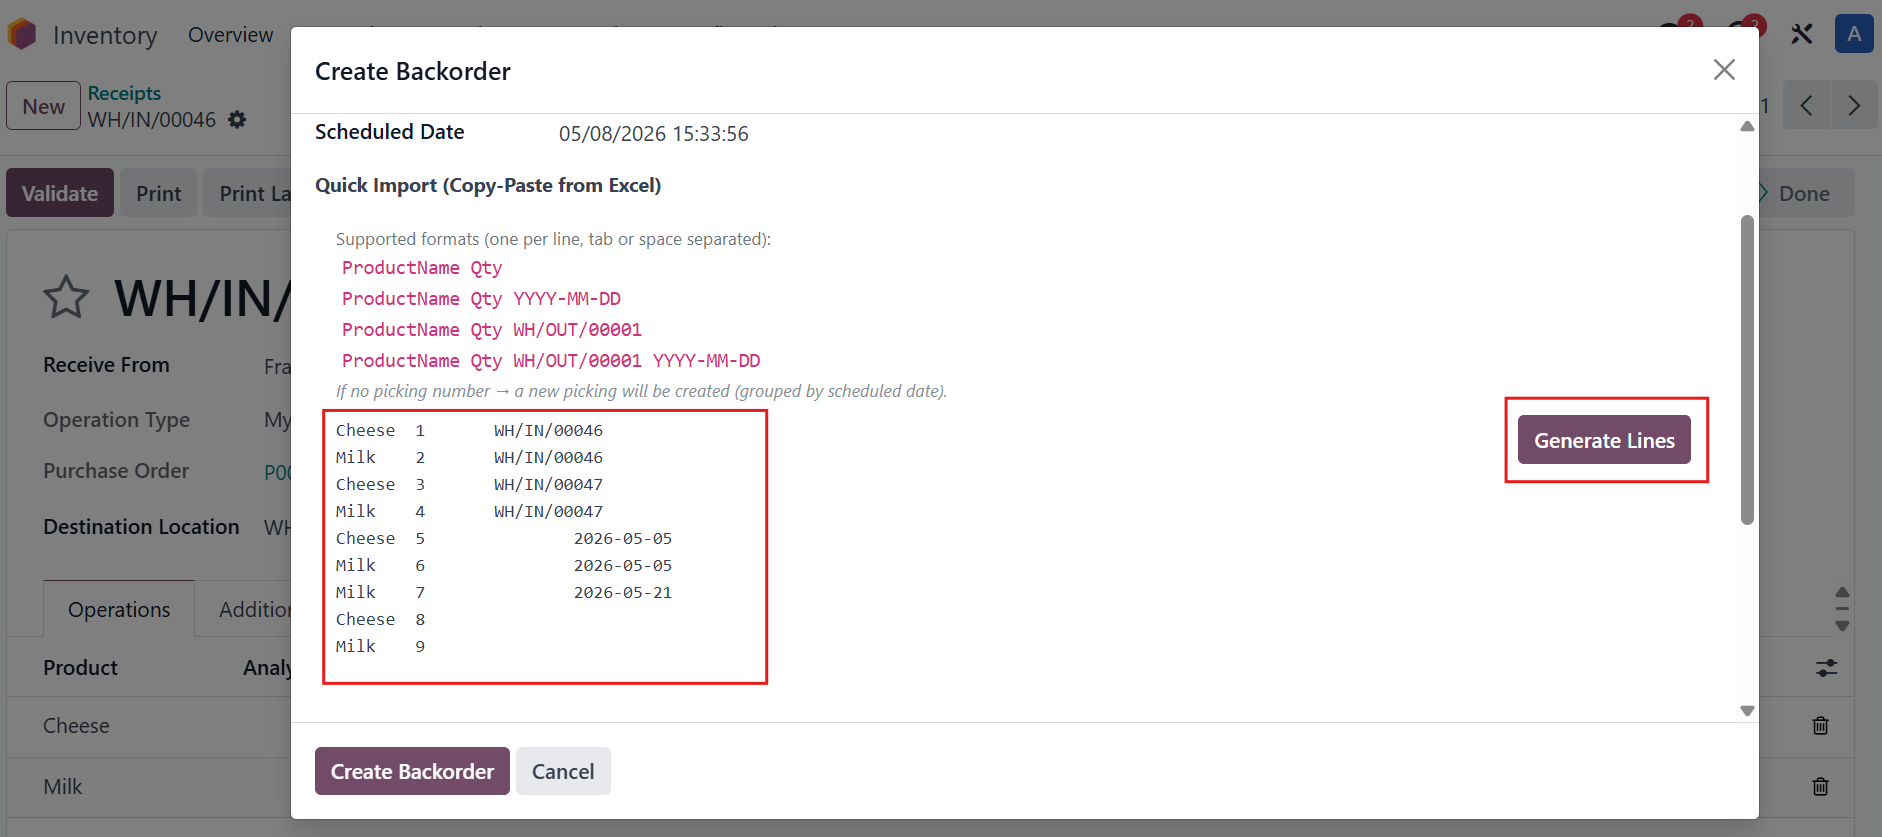
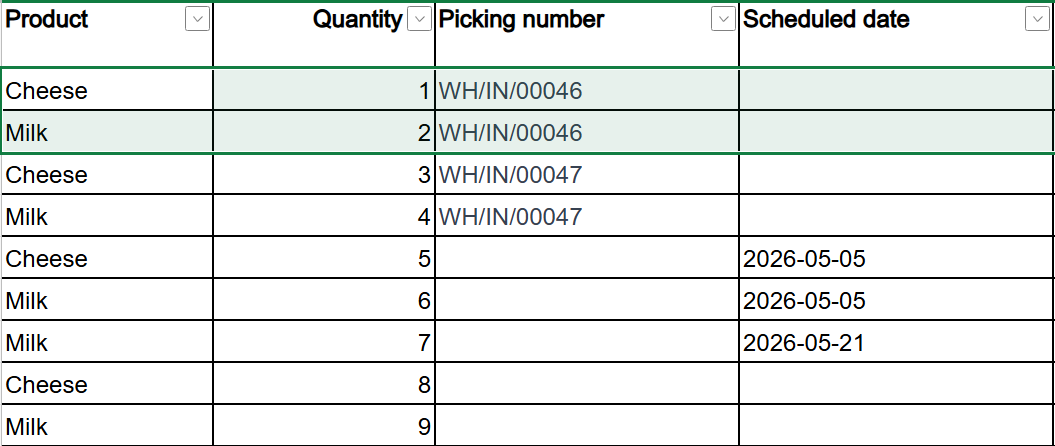
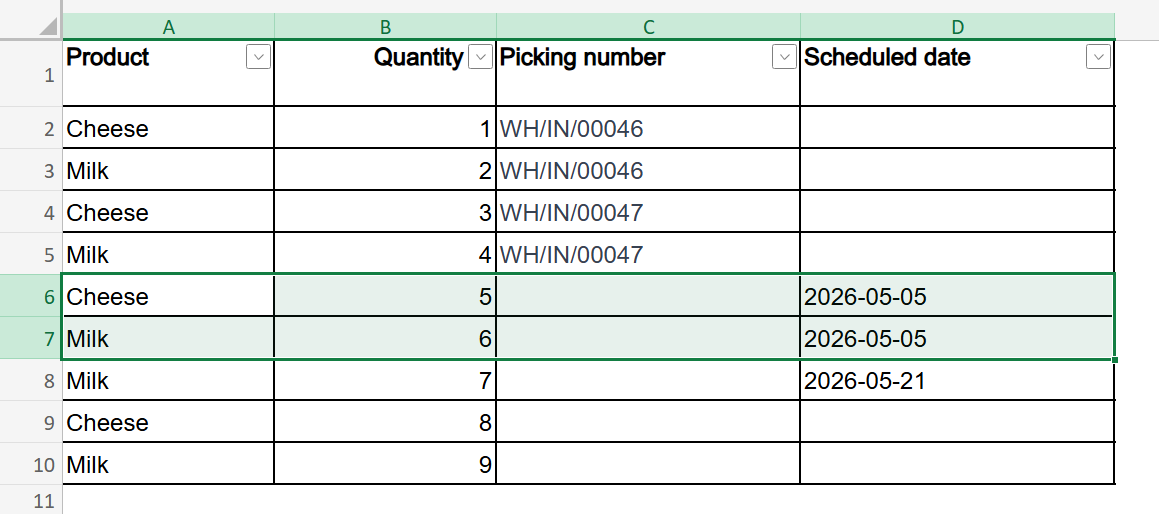
For example, we have an Excel file containing the backorder information with the following columns: Product, Quantity, Picking Number, and Scheduled Date. |
|
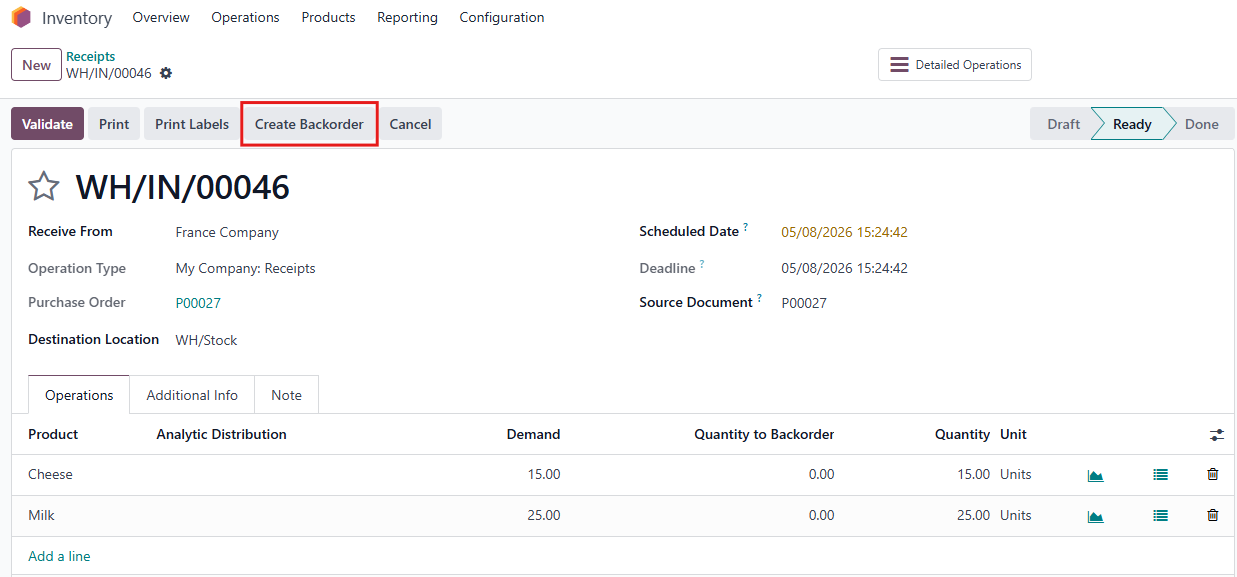
Open a transfer that is not yet completed (not in Done state), then click Create Backorder. |
|
In the wizard that opens, copy the data from your Excel file and paste it into the Quick Import field. Then click Generate Lines to parse the data. |
|
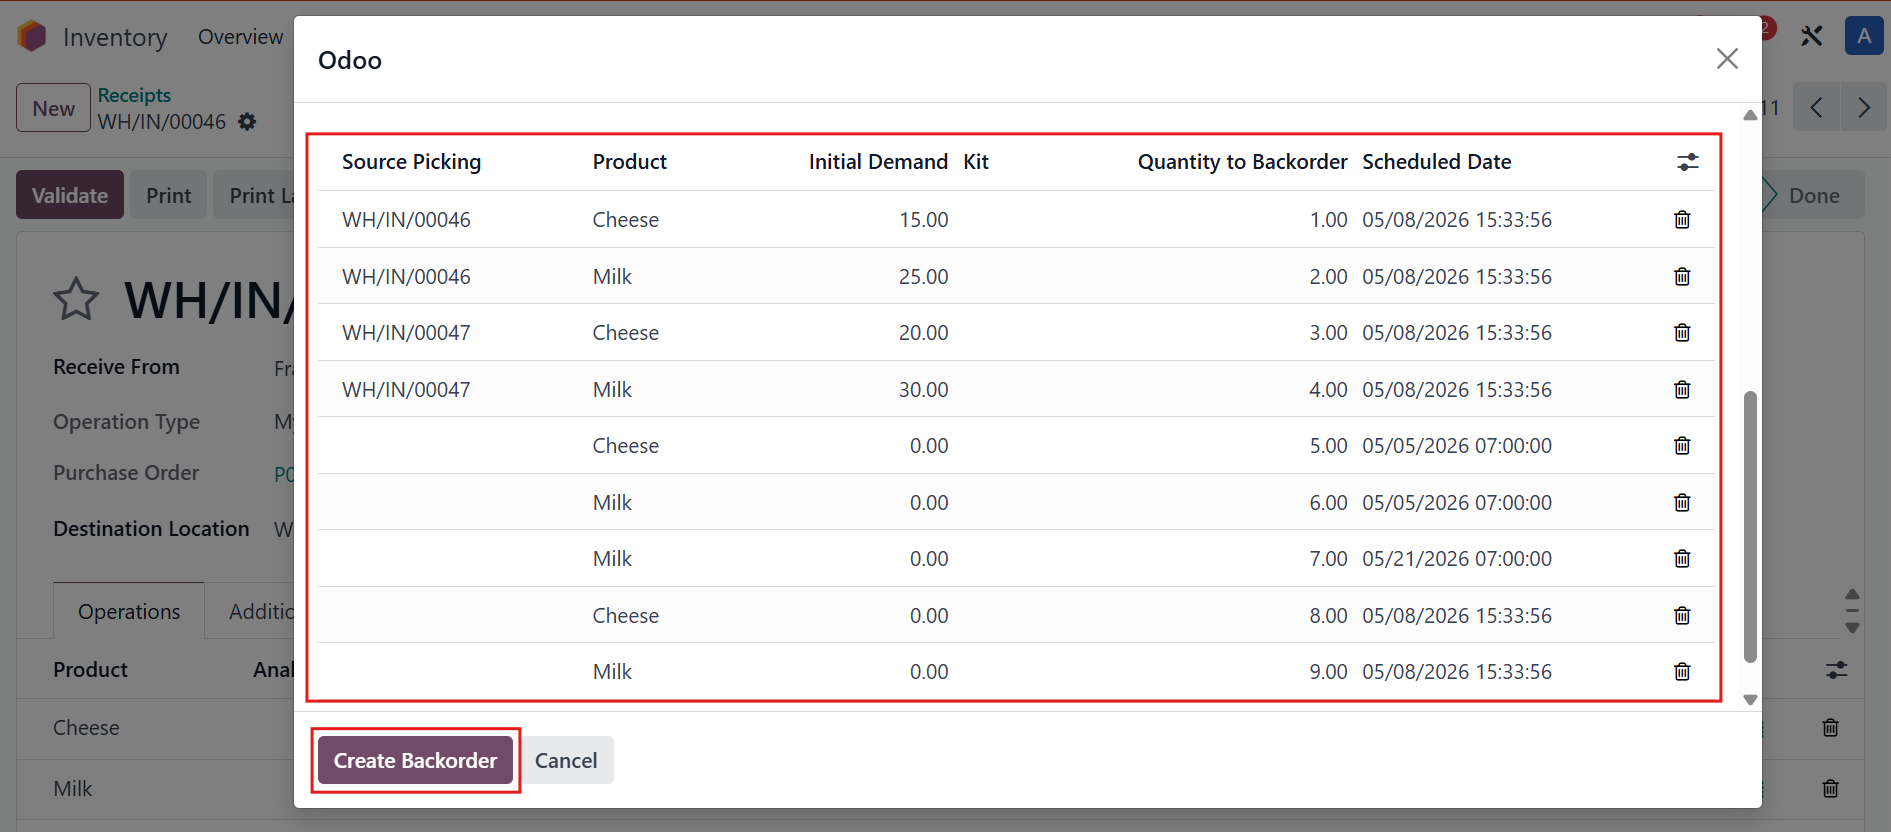
The system will display all imported information > Review the details, then click Create Backorder to confirm. |
|
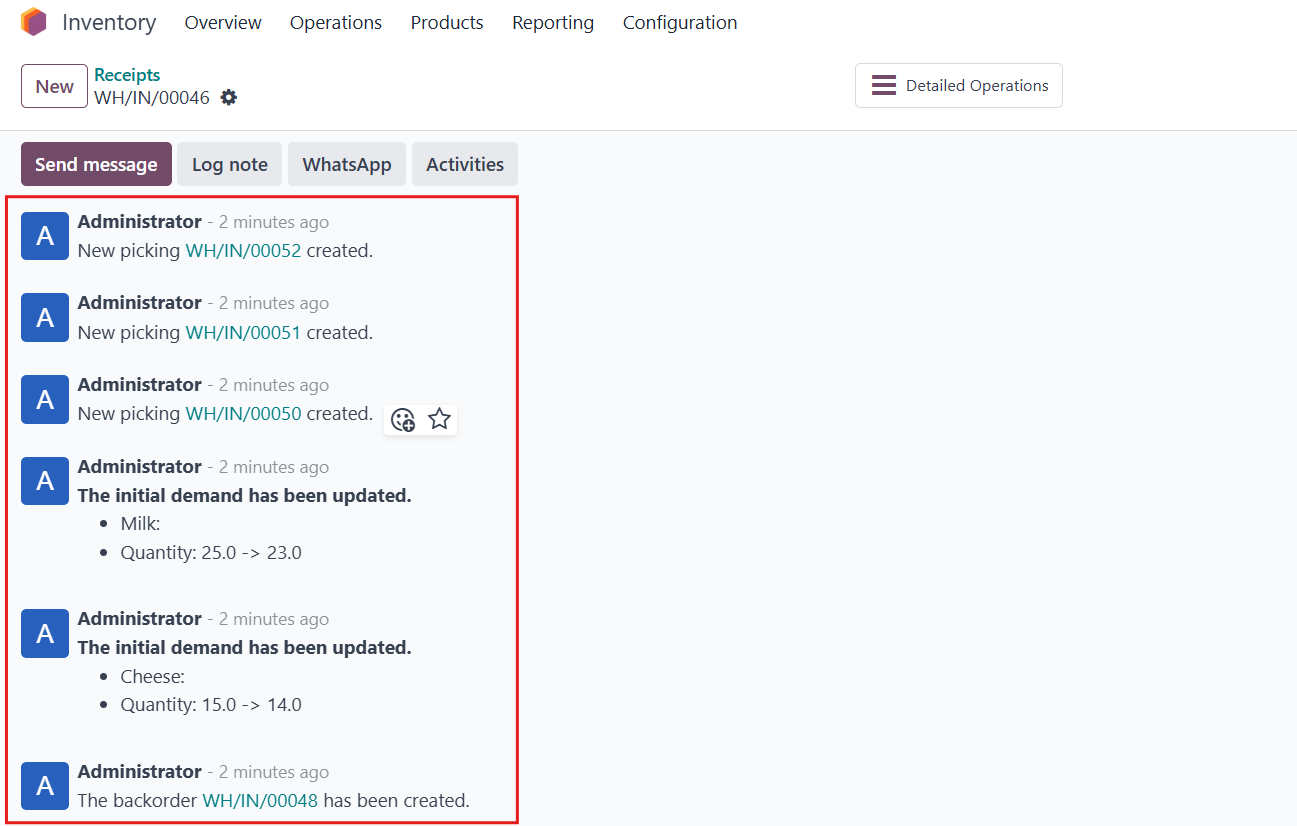
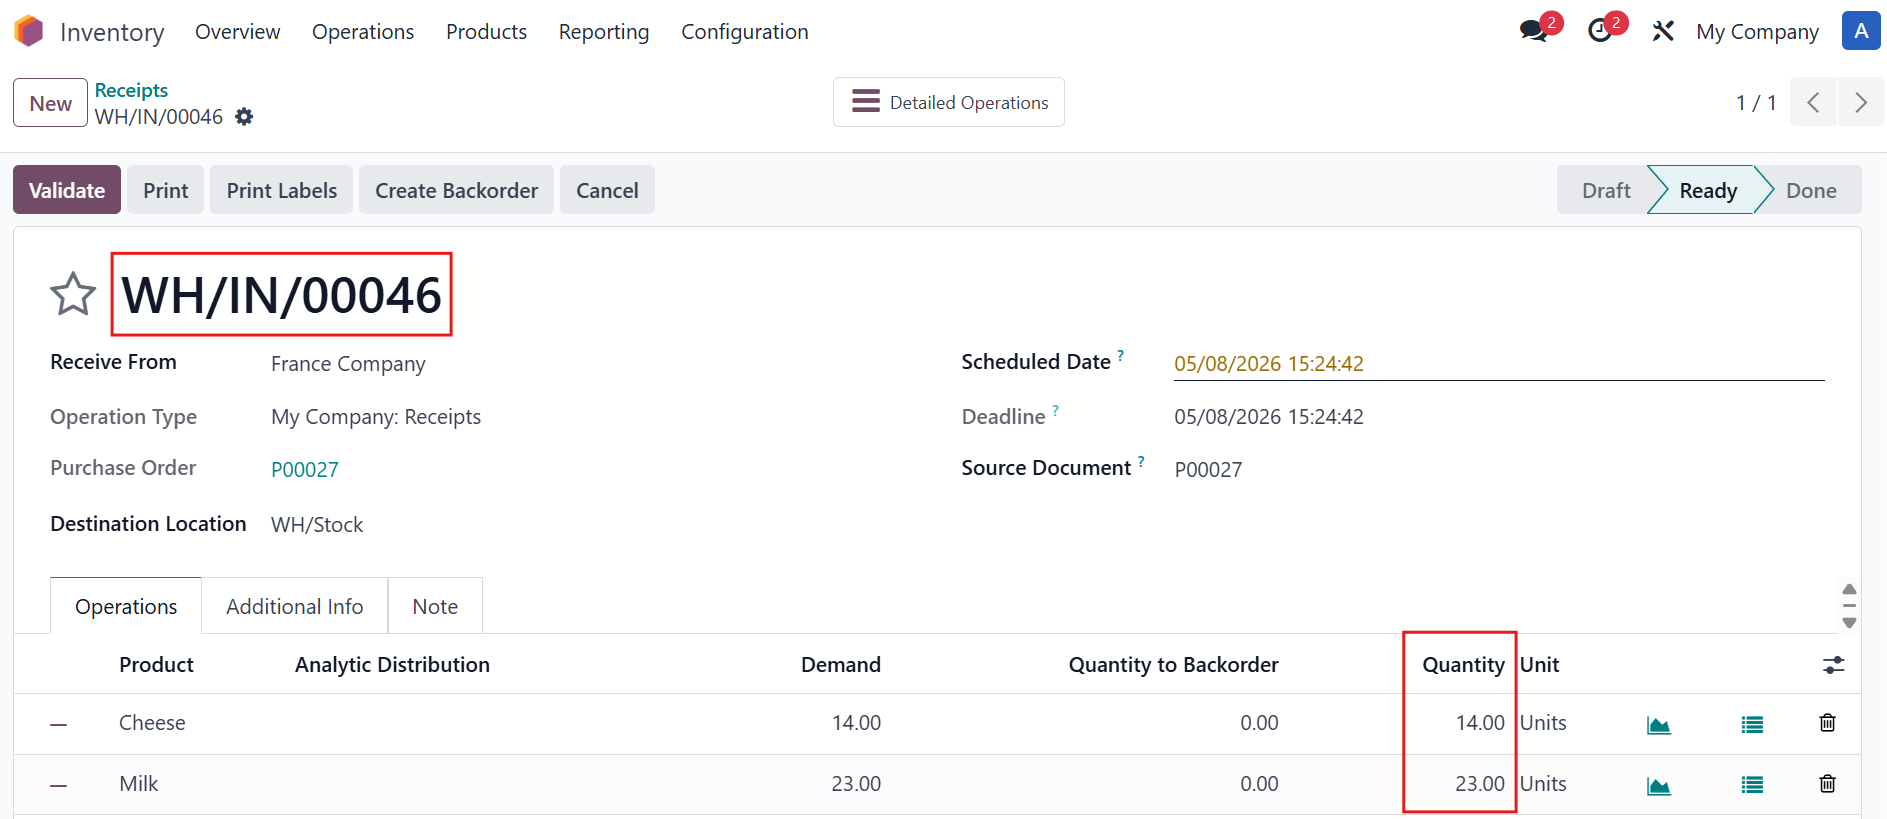
The newly created backorders and pickings are also logged in the chatter for easy tracking. Note:
|
|
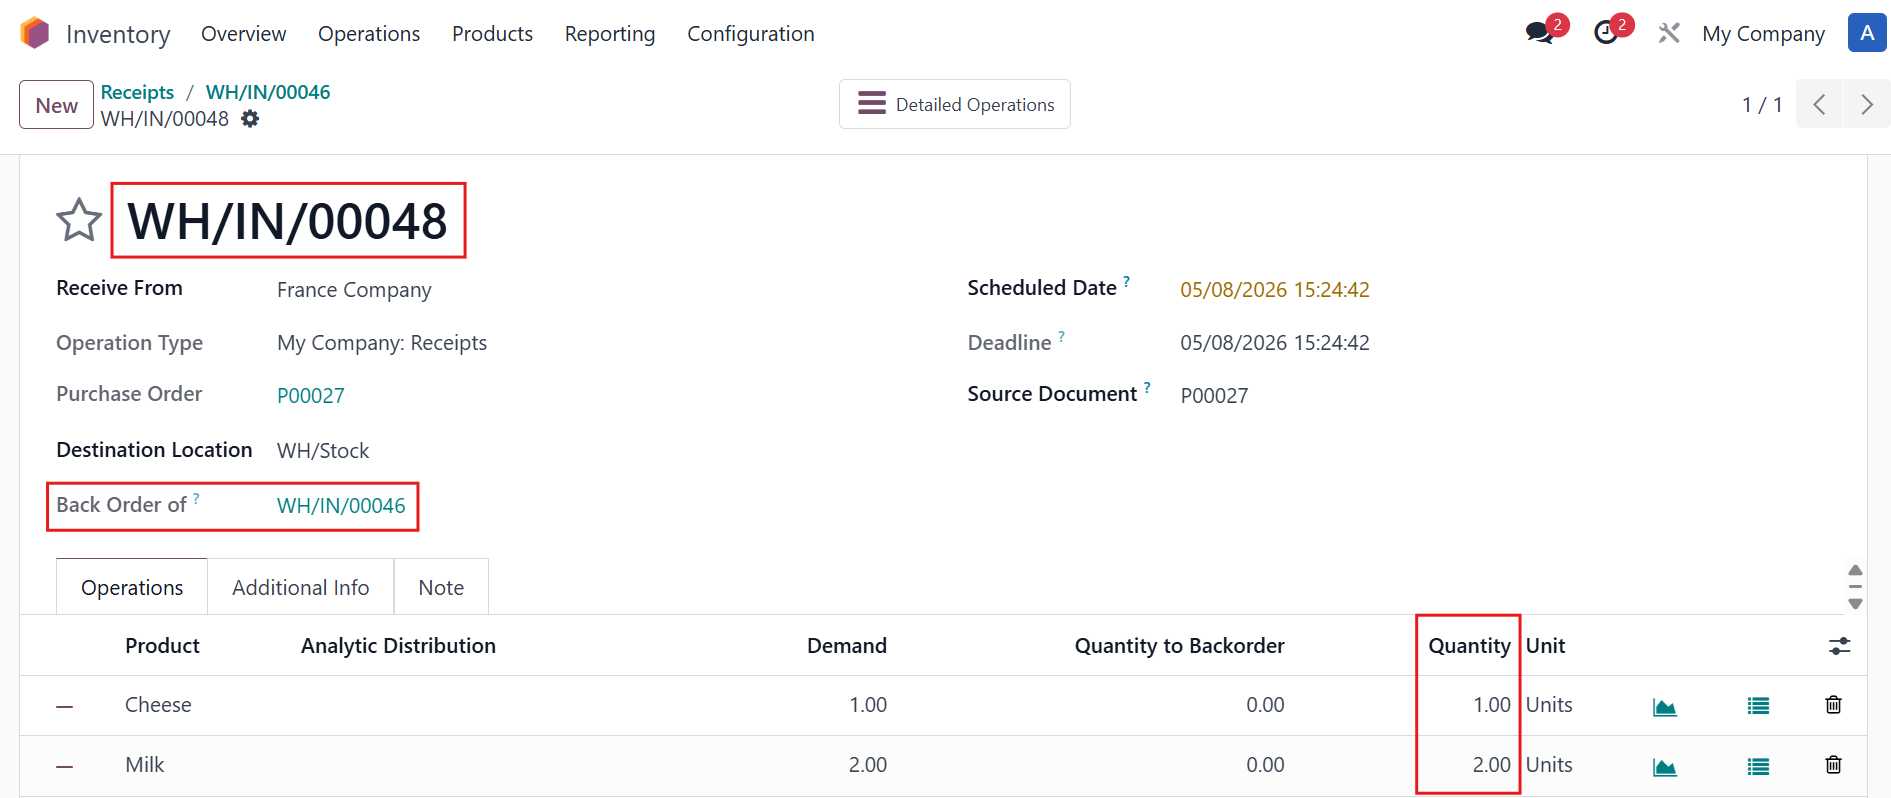
For example, the quantity in WH/IN/00046 is updated to the original quantity minus the backorder quantity.
At the same time, WH/IN/00048 is automatically created as a backorder of WH/IN/00046. |
|
New picking WH/IN/00050 is created and grouped by scheduled date 2026-05-05 |
|