

ODOO'S FUNCTION
In Odoo, calculating an item's expected arrival is a straightforward, automated process. The system determines the receipt date by taking the date the Purchase Order (PO) is officially confirmed and simply adding the vendor's pre-configured lead time. Once calculated, this expected arrival date is automatically populated as the Scheduled Date on the corresponding transfer.
CLUEDOO'S FUNCTION
CLuedoo extends Odoo’s standard functionality by adding more dynamic tracking capabilities and new fields directly to the Purchase Order.
1️⃣ Commitment Date: This field captures the initial expected arrival date before the PO is even confirmed. Once the PO is confirmed, this date becomes strictly read-only to preserve the original baseline and is displayed (also as read-only) on the transfer.
2️⃣ Delay Field: A dedicated field added to help track and manage any shipping or vendor delays.
3️⃣ Manual Expected Arrival: Manually define the Expected Arrival on PO/POL.
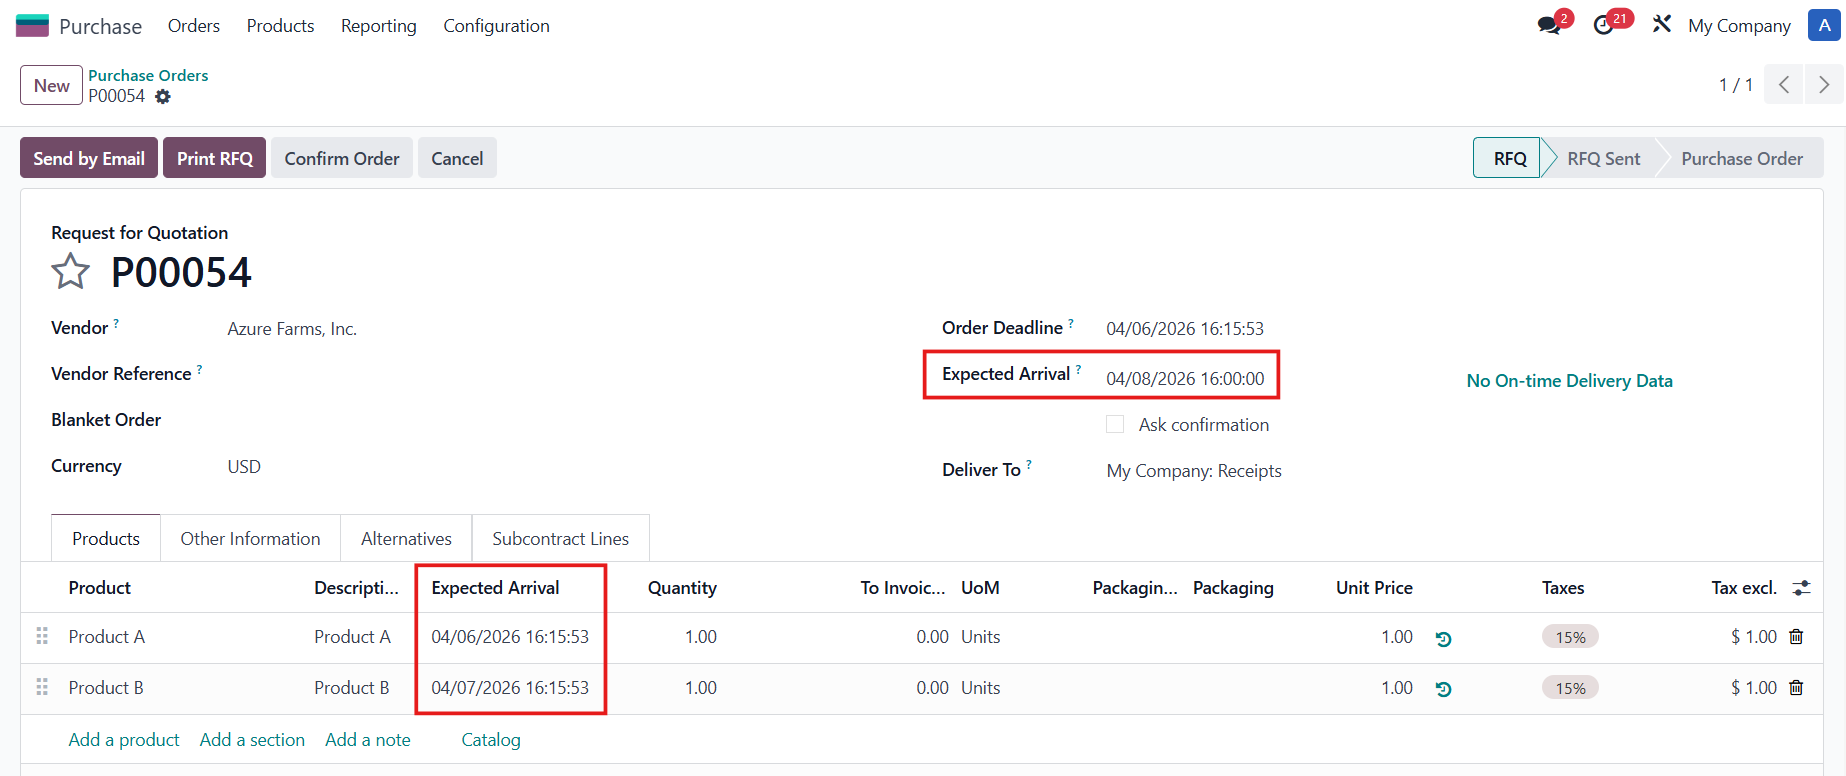
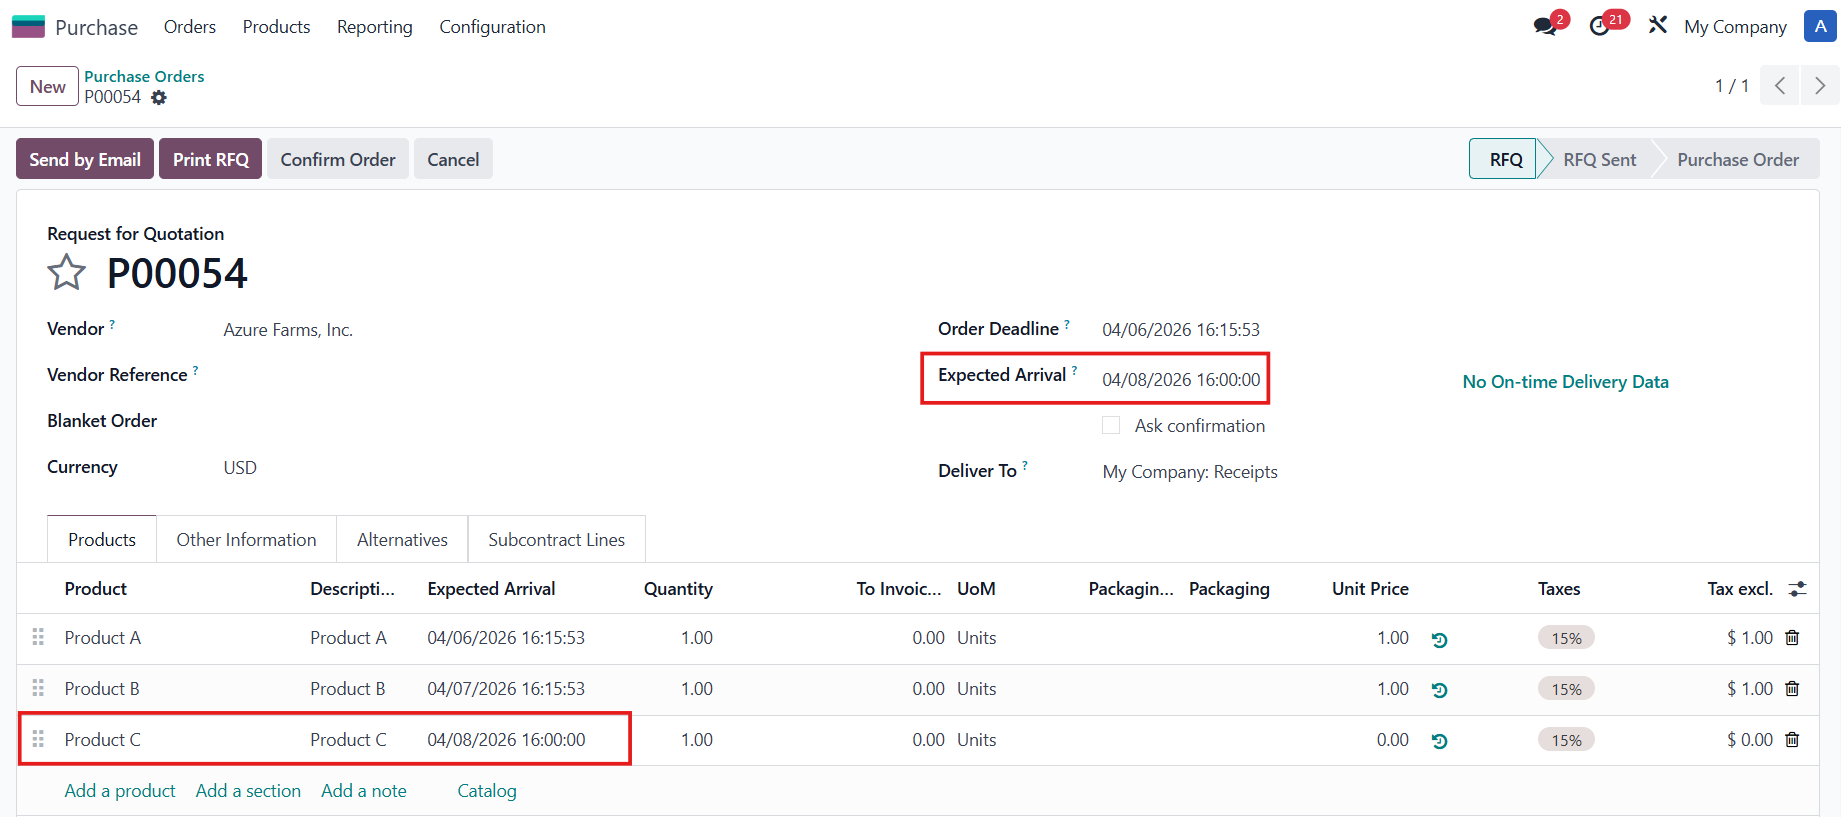
COMMITMENT DATE1. Go to Purchase > Orders > Requests for Quotation > Create a new RFQ Fill in the Expected Arrival and Delivery Date (Commitment Date) > Confirm | 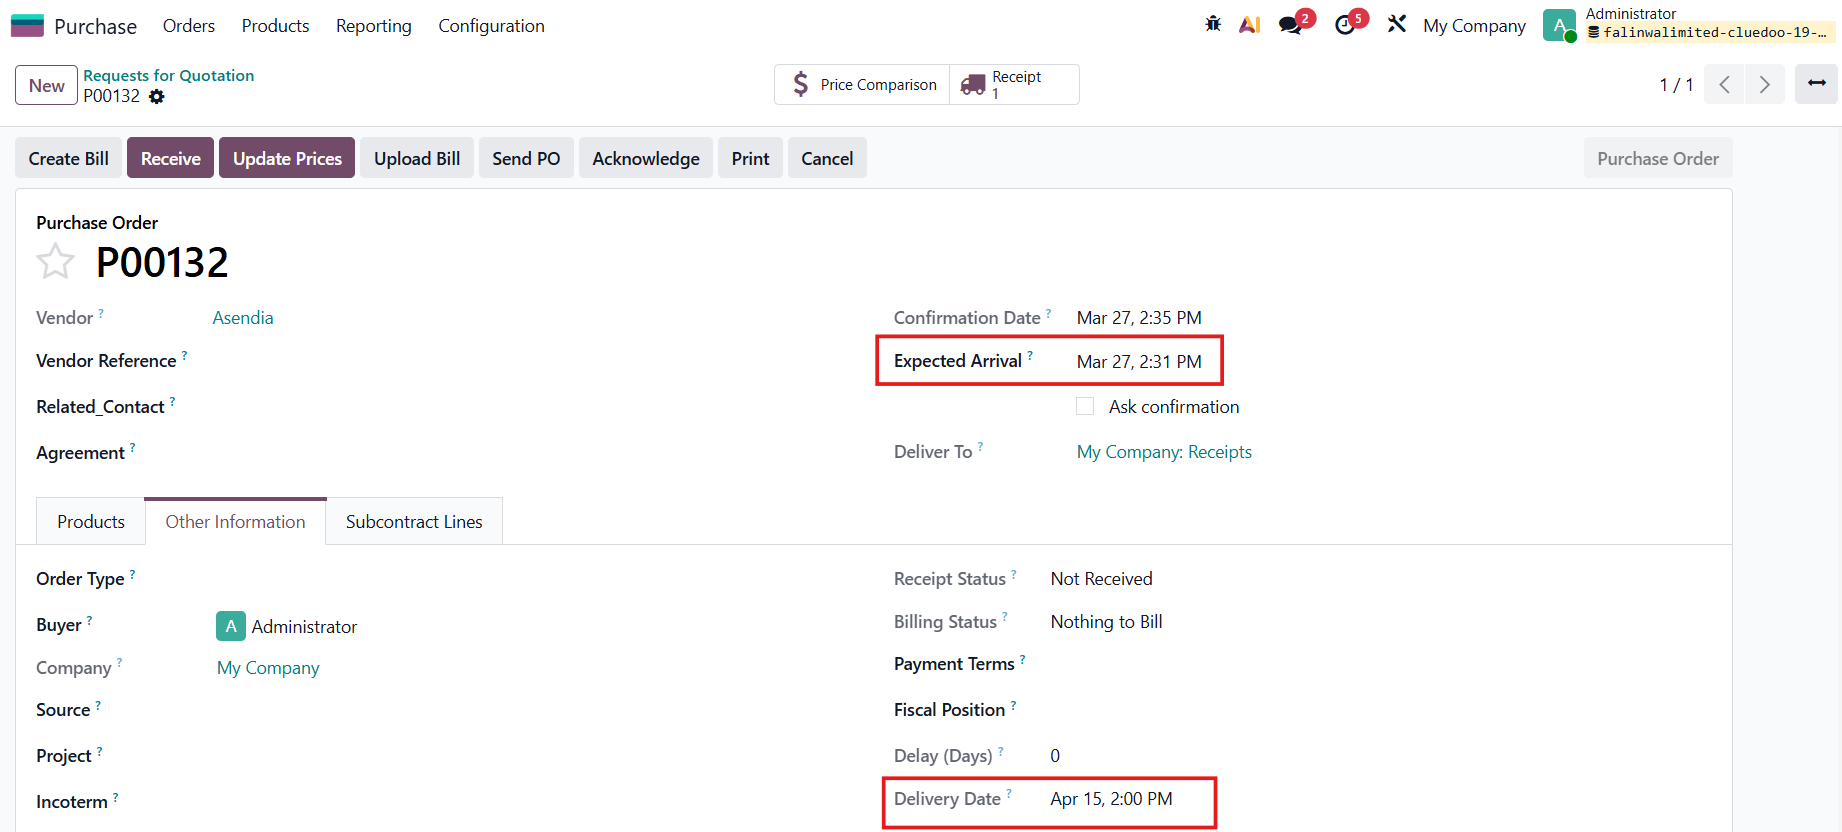 |
2. Access the Receipt
|  |
3. Go back to the PO > change the Expected Arrival | 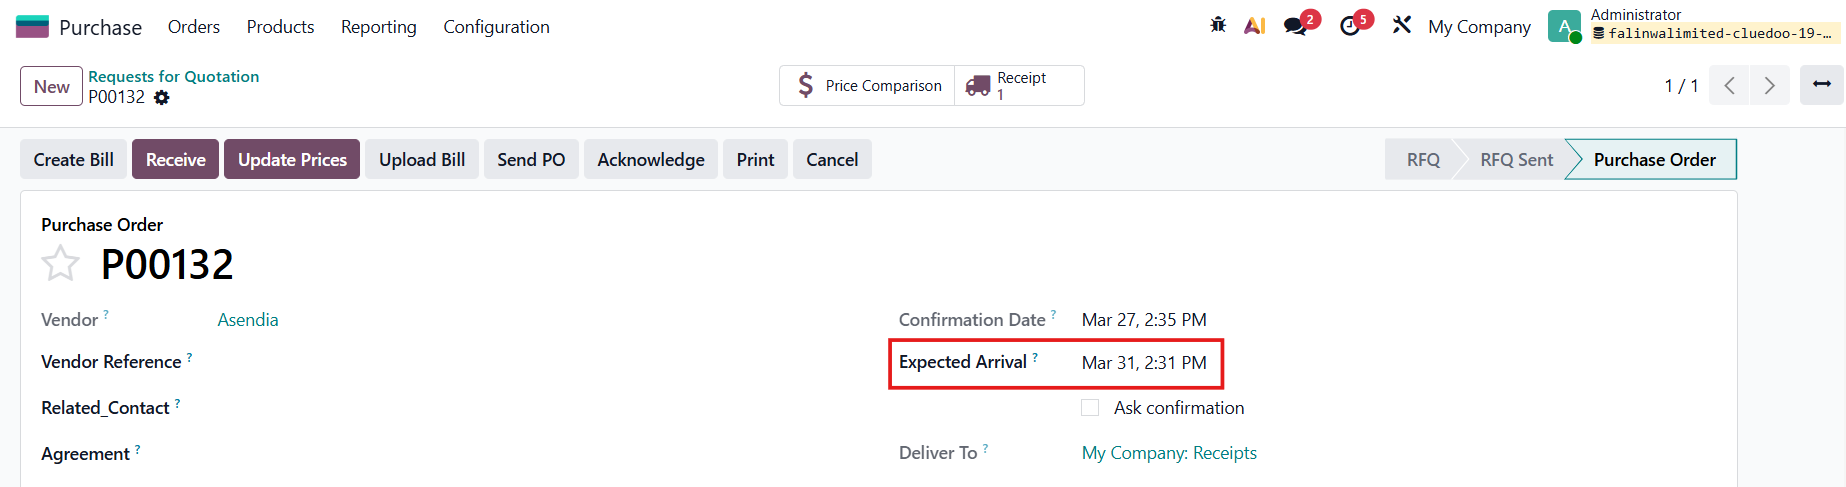 |
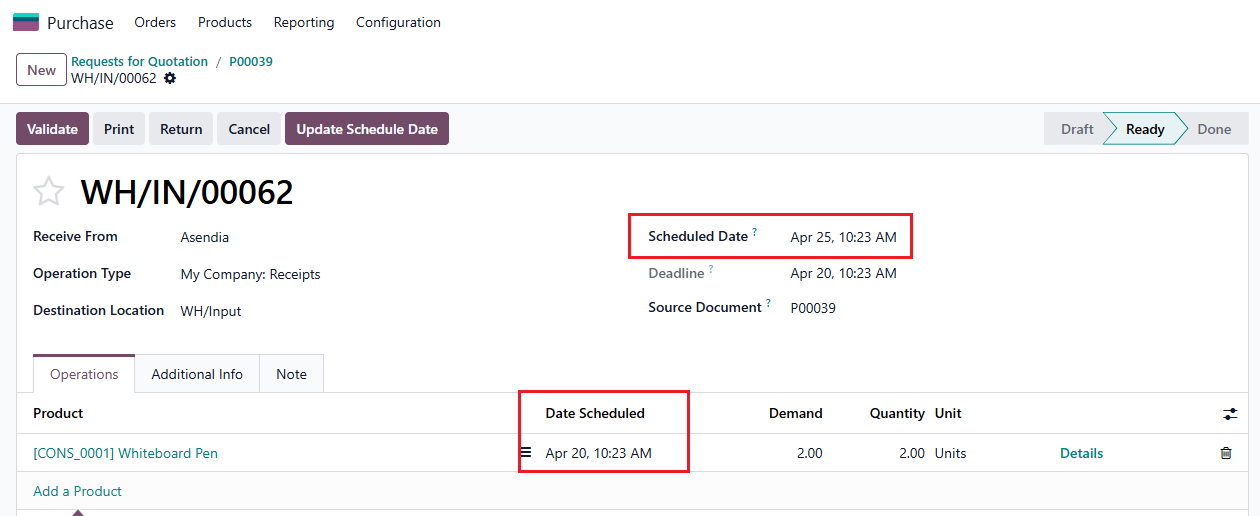
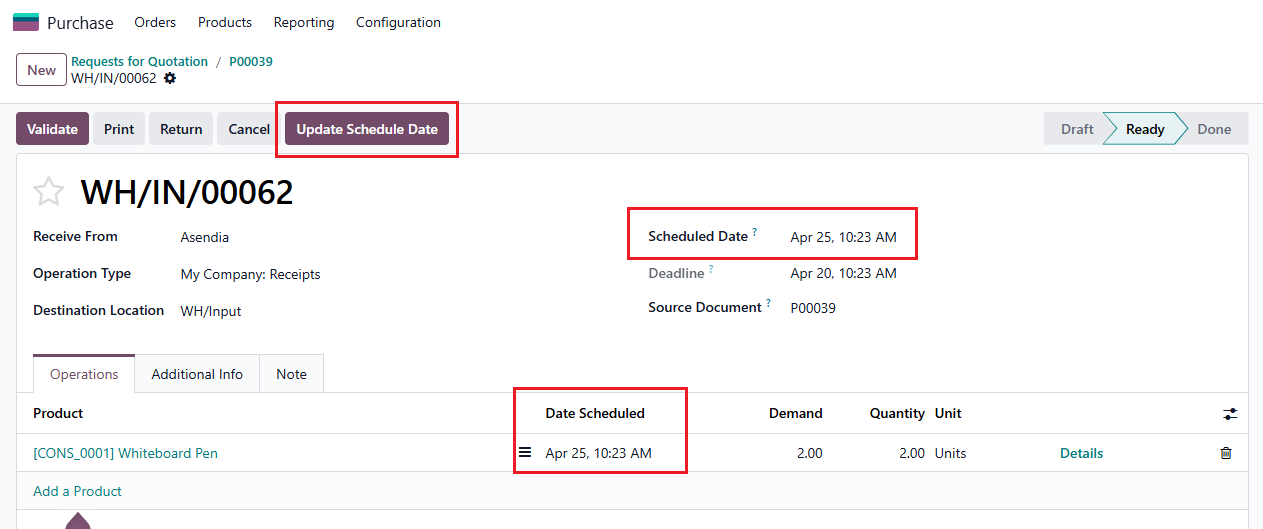
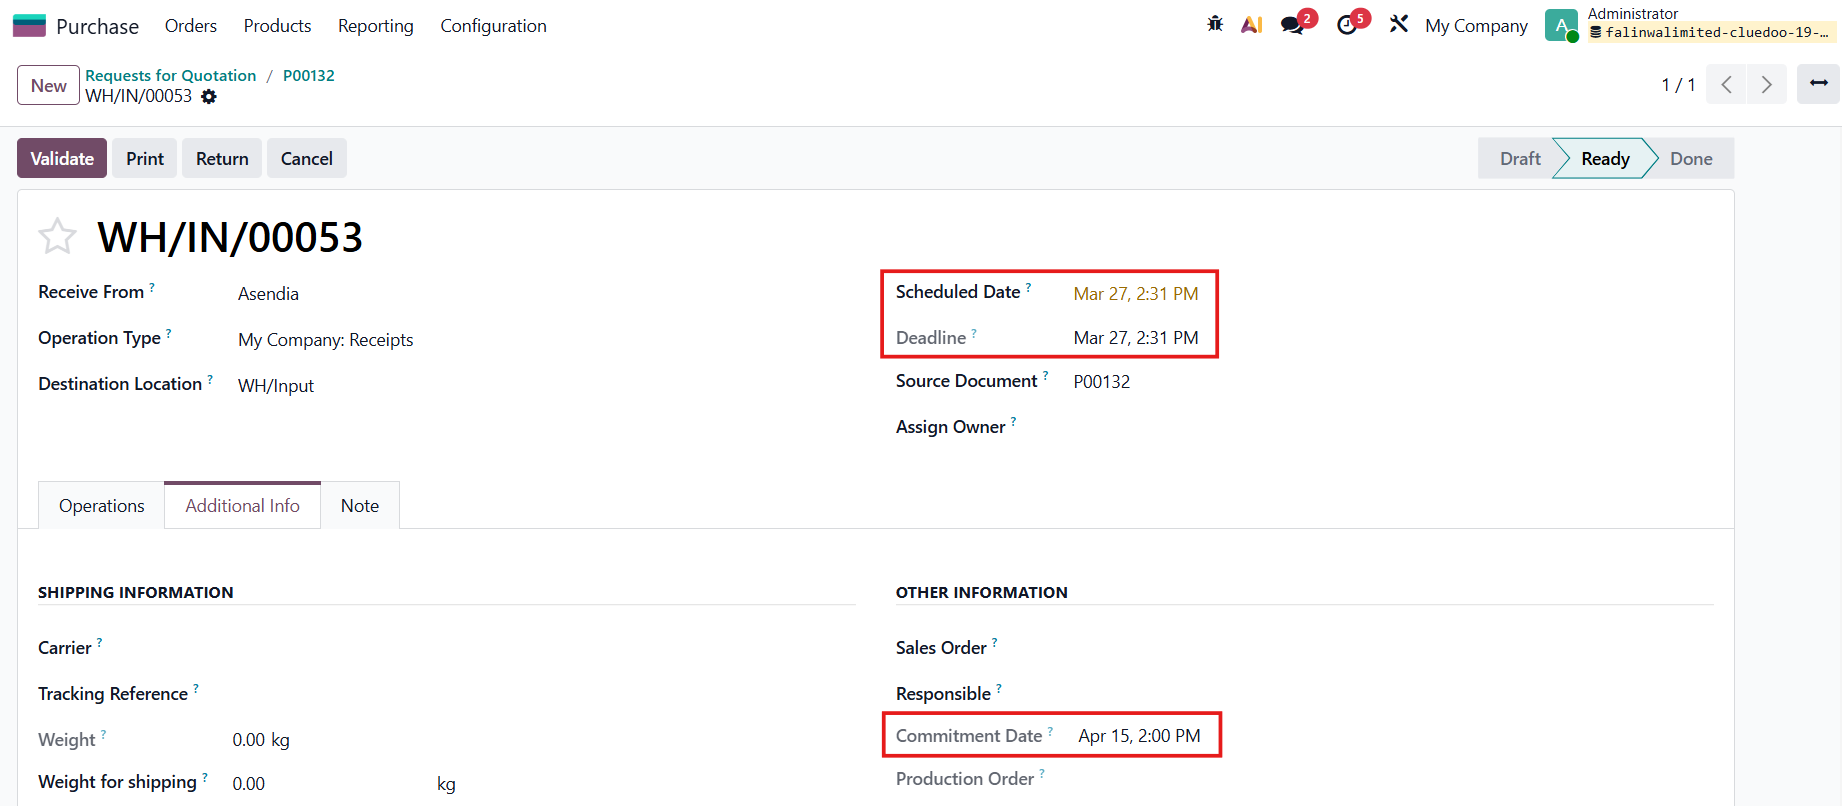
SCHEDULED DATE PROPAGATIONThe Scheduled Date and the Deadline in the receipt will change accordingly. | 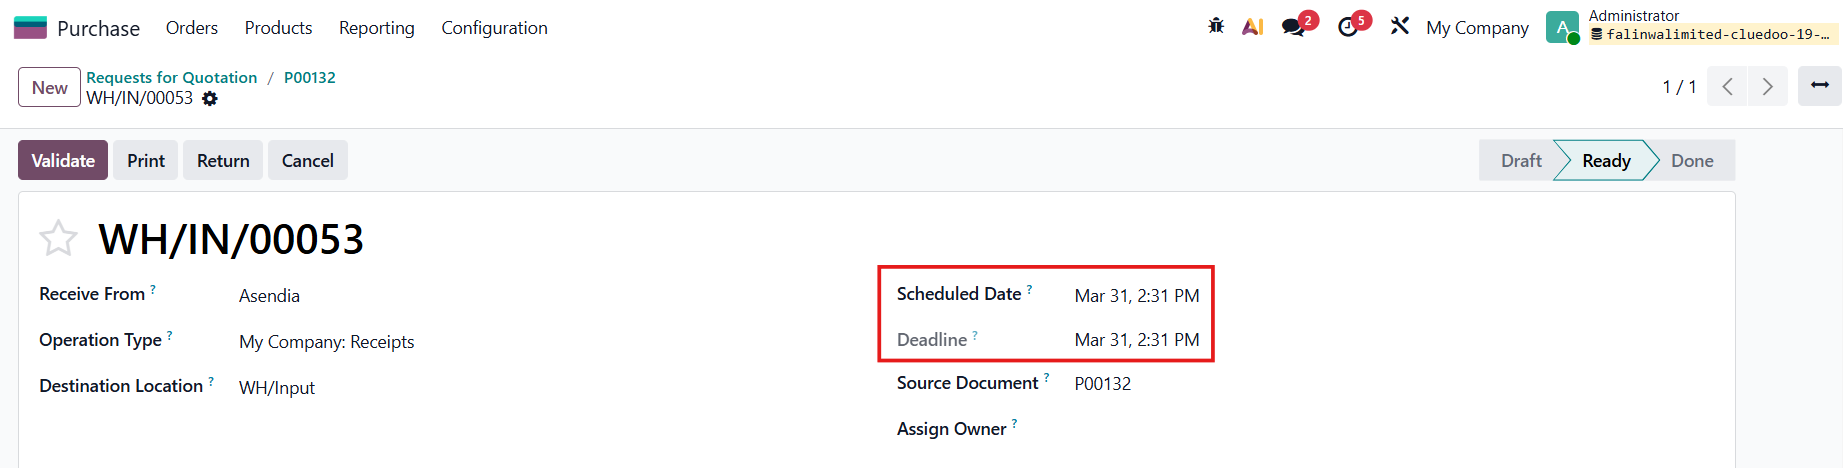 |
4. Validate the transfer > The Effective Date will appear | 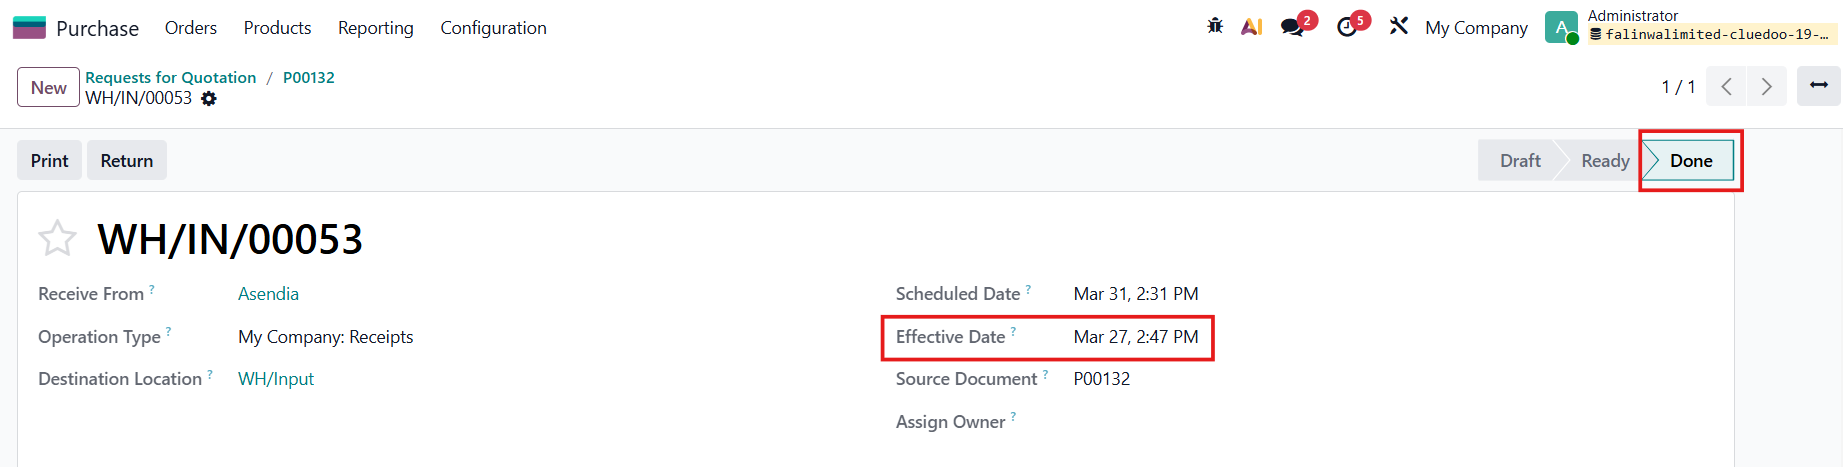 |
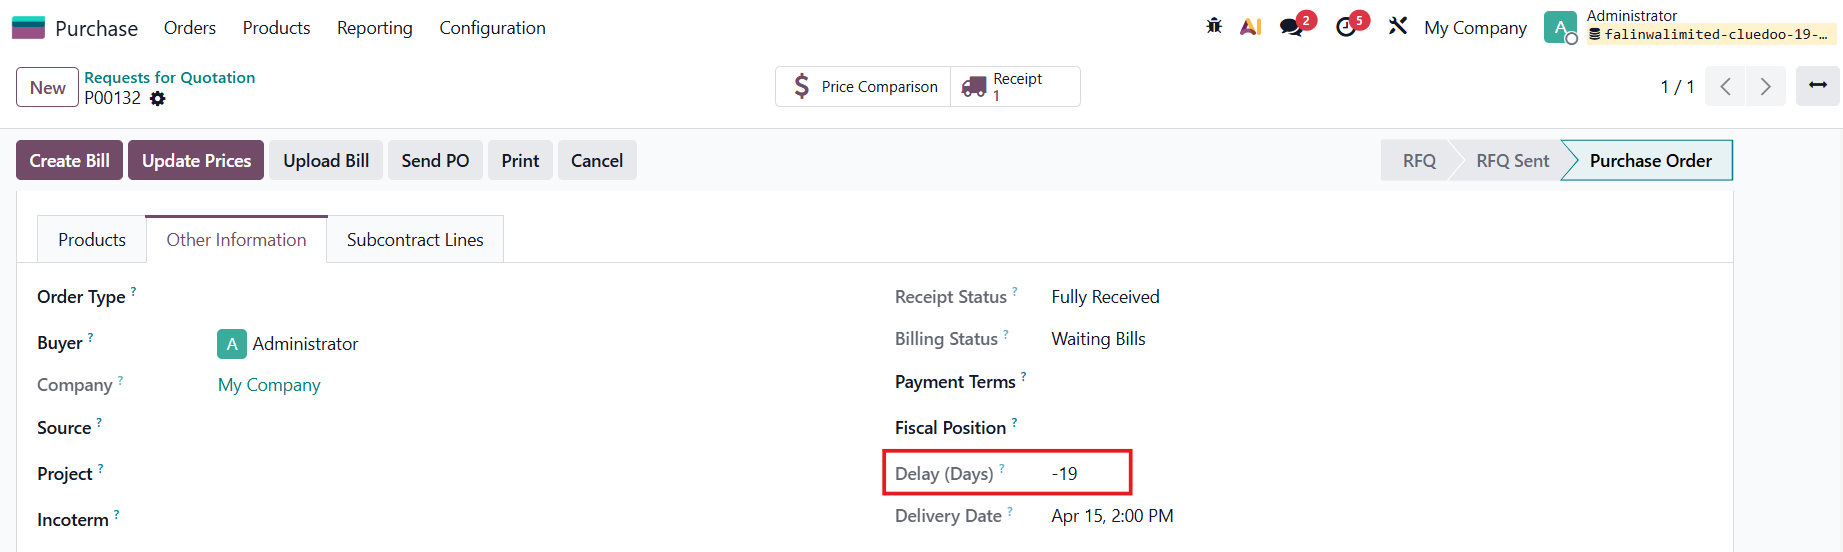
DELAY5. Go back to the PO Delay (Days) = Effective Date - Commitment Date (PO/ Picking) |
|
Note:
|
|
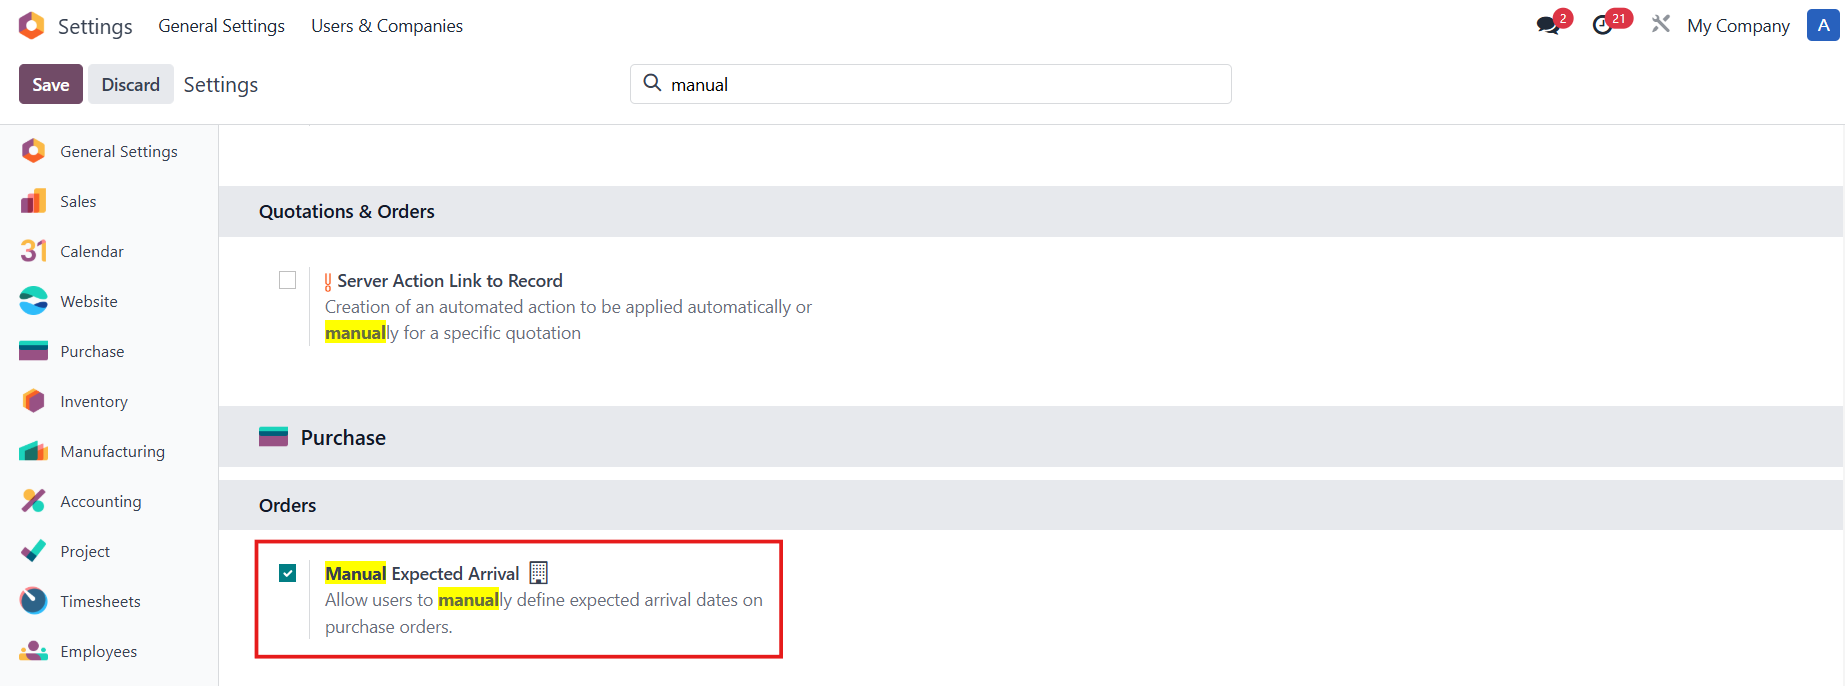
MANUAL EXPECTED ARRIVALGo to Settings > Check the Manual Expected Arrival field if you want to manually define the Expected Arrival on the PO. |
|
Create a Purchase Order > Even when there is an Expected Arrival on the POL, the main Expected Arrival will remain empty. |
|
Notes:
|
|
|
|
Confirm the PO > Go to the Receipt
|
|