

ODOO'S FUNCTION
In standard Odoo, Quality Checks are limited exclusively to physical products. Users can define control points based on operation types (e.g., Receipts, Deliveries, Manufacturing) and the specific product or product category. When an operation is triggered, a quality check is automatically created. This functionality does not cover service-type products within its default configuration.
CLUEDOO'S FUNCTION
CLuedoo enhances Odoo's quality control functionality by introducing:
- The extension of quality control points to cover service-type products.
- The ability to create quality control points based on task templates or task categories rather than just physical products.
- Automatic generation of a quality check when a project uses a specific task template or contains tasks of the selected category.
This allows businesses to maintain the same level of oversight and quality assurance for services as they do for physical products, leveraging the familiar Odoo functionality while expanding it to manage service quality. The feature seamlessly integrates into the existing system, allowing for consistent quality control across both goods and services.
CONFIGURATION | |
Go to Quality > Quality Control > Quality Control Points > New and fill in the information > Save e.g I choose Task Category in this case and Point Type is Service |  |
USAGE | |
A. PROJECT TASKS 1. Go to Projects > Tasks > My Tasks > New > Fill in the title and the task category you just created (and Assignees if needed) > Save and you will see a Quality Checks button has been created |  |
2. Click Quality Checks and decide whether it is Pass or Fail |  |
3. Click Quality Checks after you have decided and choose your task > Choose Create Alert and you will see that the Alert has been linked to your task. |    |
4. Head back to My Tasks, Quality Checks and Quality Alerts have been added. |  |
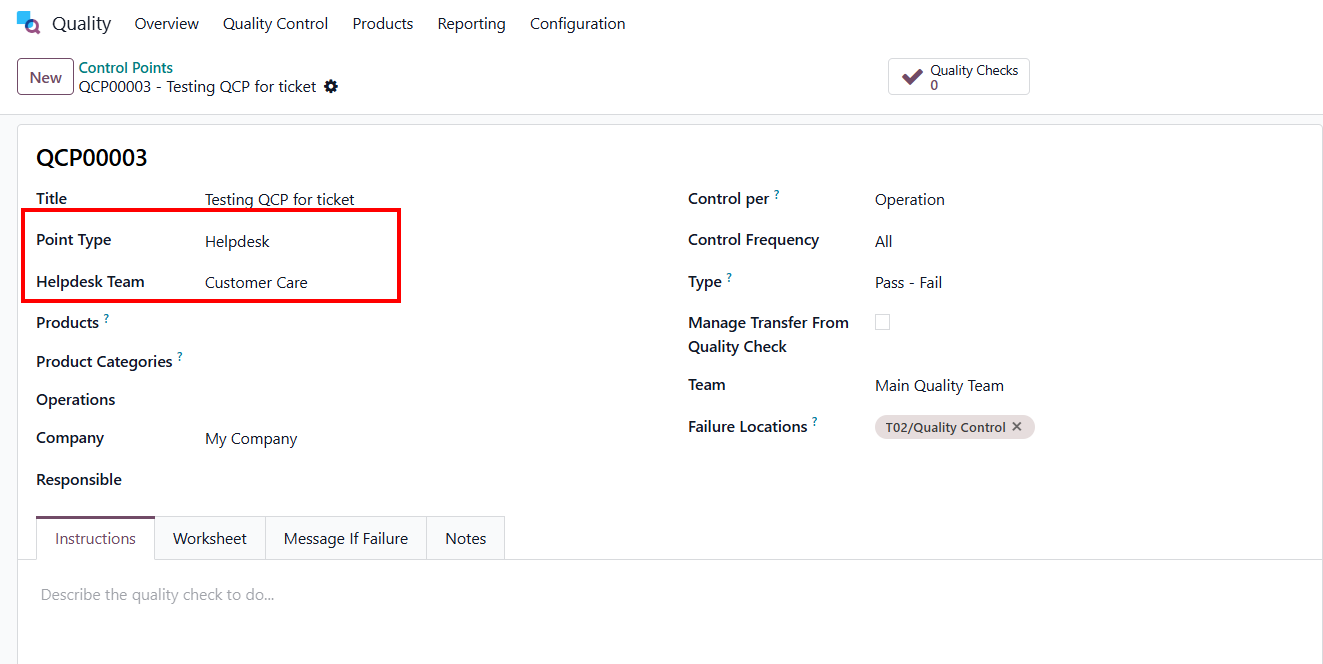
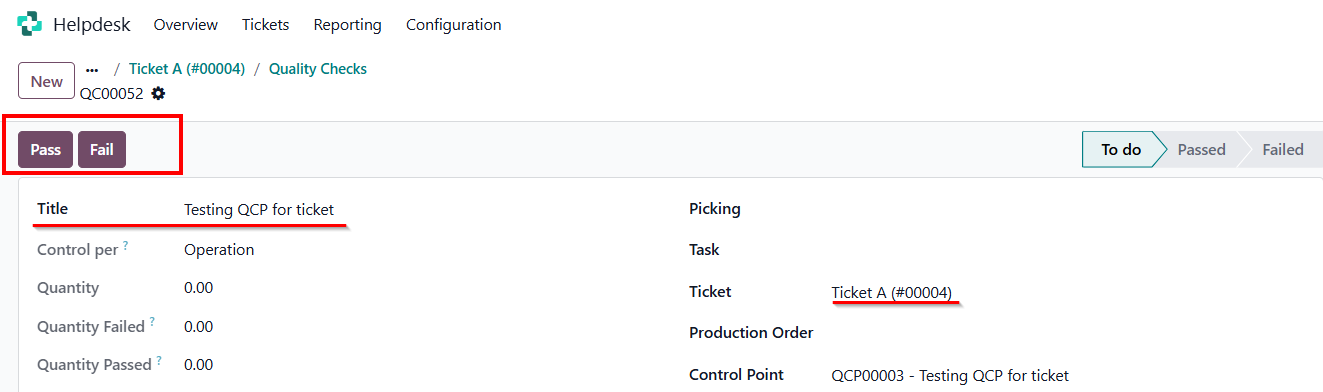
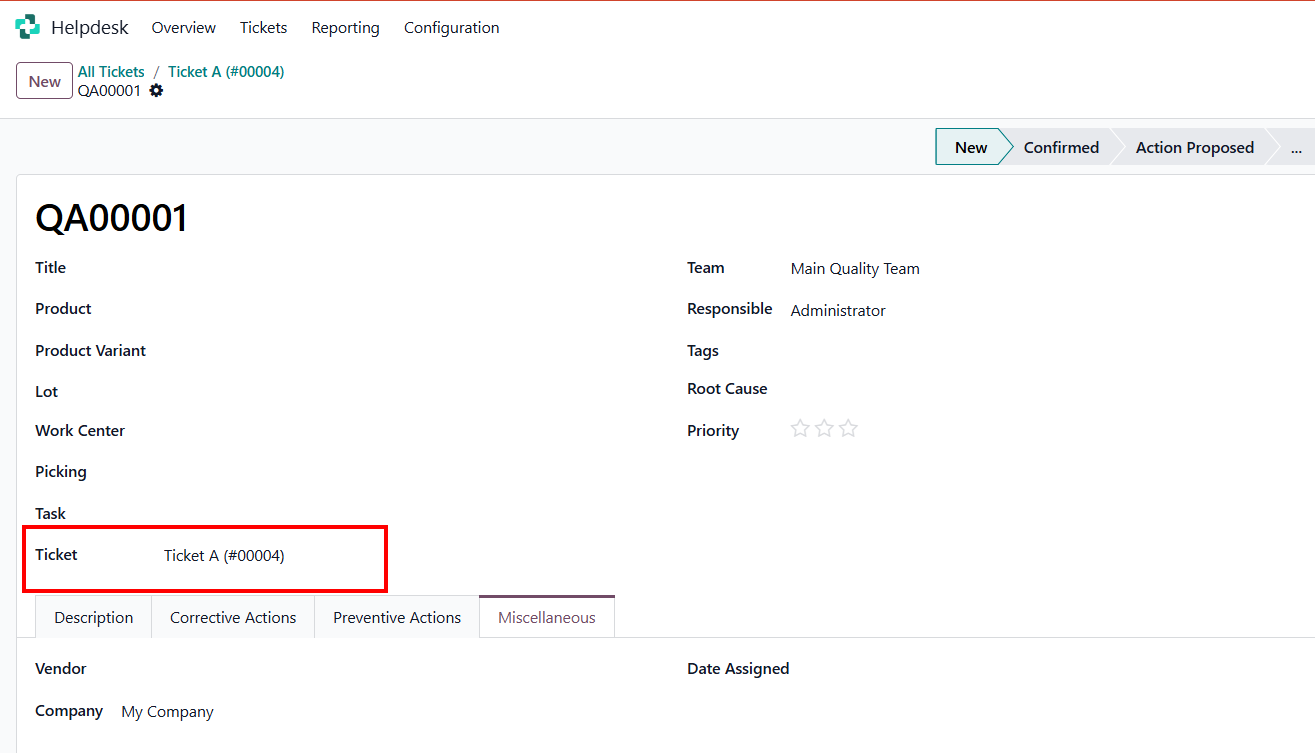
B. HELPDESK TICKETS 1. Go to Quality > Quality Control > Quality Control Points > New and configure a QCP by choosing Point Type as 'Helpdesk', then selecting a Helpdesk Team that user want to assign tickets. |
|
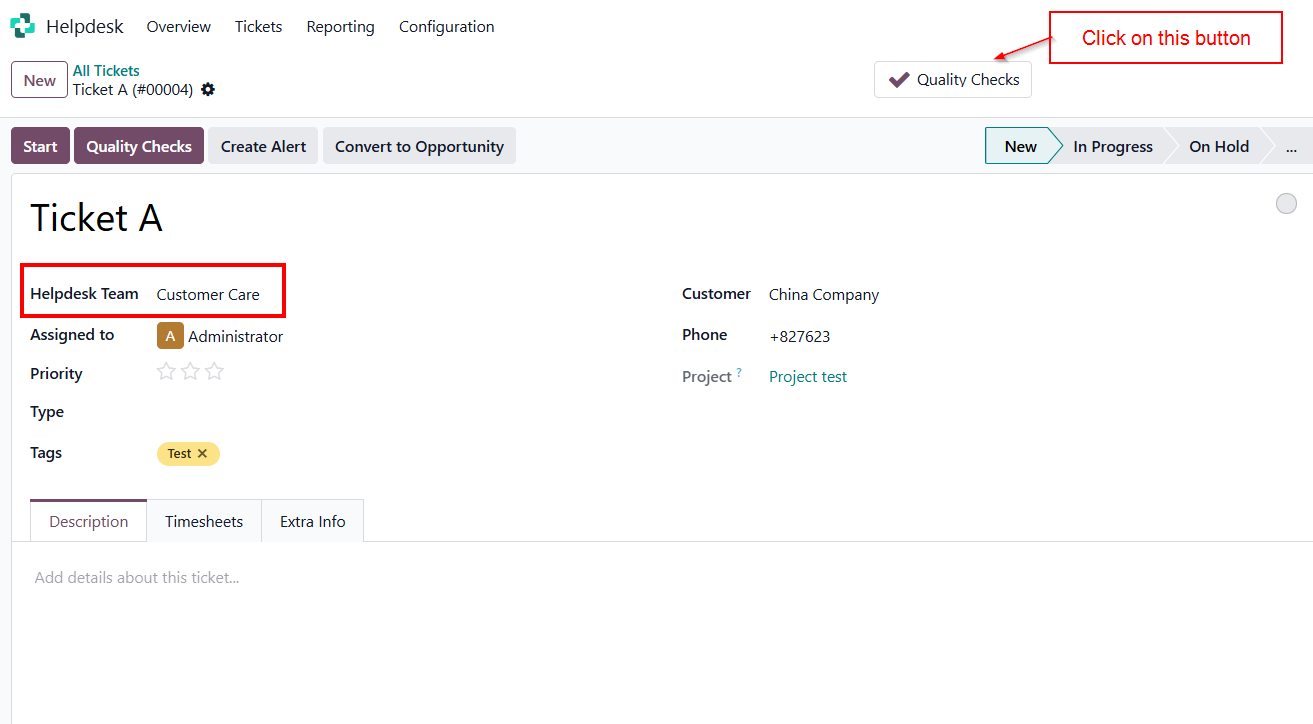
2. Go to Helpdesk > Tickets > All Tickets . New > Fill in the information and select the configured Helpdesk Team.
|
|
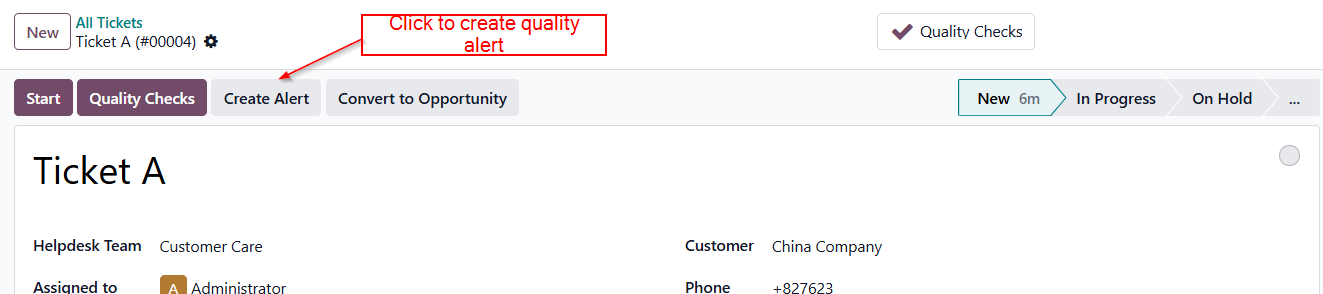
3. Click the smart button inside the Ticket interface to create a Quality Alert (QA) if any critical issue or defect arises during the support process > Fill in the necessary information. In the created Quality Alert form view, the system will automatically link it back to the source ticket reference in the Ticket field for full traceability. |
|