


ODOO'S FUNCTION
Odoo doesn't allow us to grant specific permissions to portal users to perform actions in quotations
CLUEDOO'S FUNCTION
CLuedoo empowers your quotation workflow by extending customizable access rights to portal users, introducing:
1️⃣Granular Access Control: Assign precise read, write, and create permissions to portal users, giving them controlled access to quotation fields.
2️⃣Full Field Interaction: Portal users can update and manage every field in the quotation based on the rights granted, reducing bottlenecks and improving collaboration.
1. Create portal user account Go to Setting > User & Companies > User Choose New: Input name, email address, User types: choose Portal then Save |  |
Guide To Setting Up Each Field1.Contact1.1. Access RightClick on Add a line > Search for the access right named res_partner group_portal (with the model is Contact, and Group is User types/Portal) > Select > The selected access right will appear inside Access Right Tab > Click on it > Grant different permissions in the pop-up |   |
Note from v19: User types/Portal becomes Role/Portal | 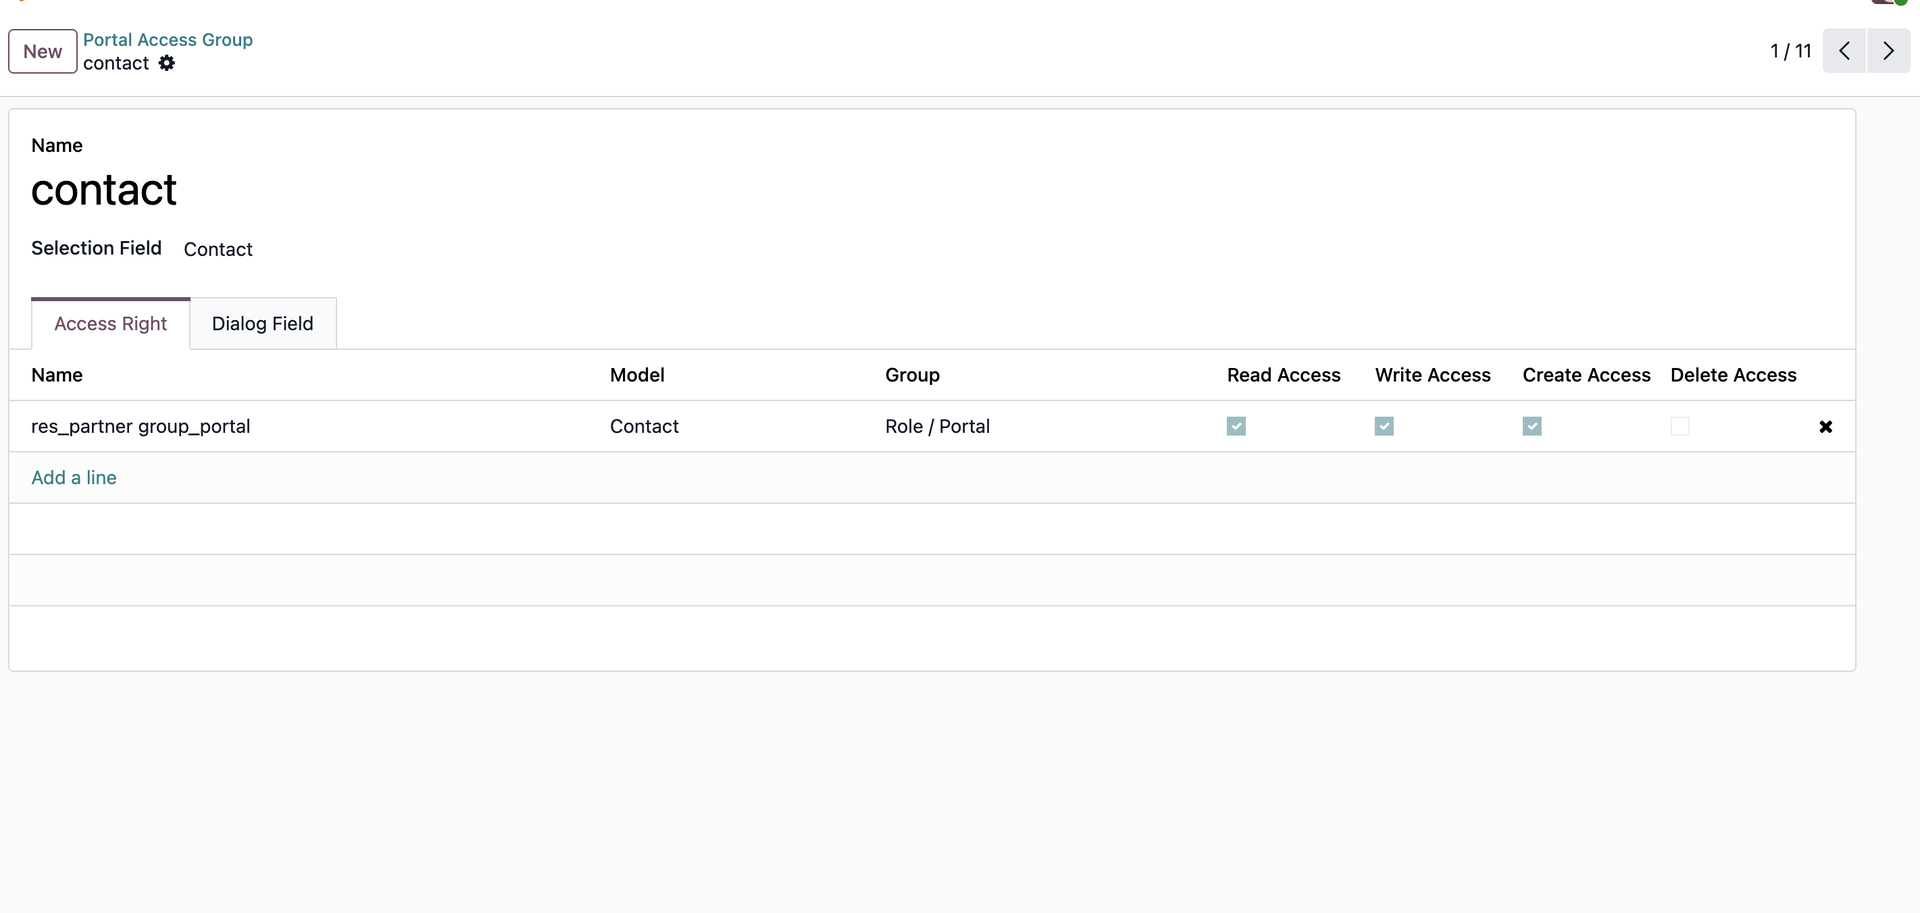 |
1.2. Dialog FieldMove to Dialog Field Tab > We can create fields or select existing ones which we want to appear in the pop-up where portal users create new objects Available fields:
|  |
2. PricelistClick on Add a line > Click on New > Checkout following the below steps: - Fill in the Name field EX: I enter "Pricelist" - Search for Model: Pricelist - Search for Group: User types/ Portal - Make sure the Active button is checked - Grant different permissions > Save Note: Before creating a new access right for this selection field, we should check whether it has already been created or not. If it exists, select the existing one; otherwise, follow the above steps Note from v19: User types/Portal becomes Role/Portal |  |
3. Payment TermClick on Add a line > Click on New > Check out following the below steps: - Fill in the Name field EX: I enter "Payment Term" - Search for Model: Payment Terms - Search for Group: User types/ Portal - Make sure the Active button is checked - Grant different permissions > Save Note: Before creating a new access right for this selection field, we should check whether it has already been created or not. If it exists, select the existing one; otherwise, follow the above steps Note from v19: User types/Portal becomes Role/Portal |  |
4. Customer ReferenceClick on Add a line > Search for the access right named sale.order.portal > Select > The selected access right will appear inside Access Right Tab > Click on it > Grant different permissions in the pop-up |   |
5. Delivery DateClick on Add a line > Search for the access right named fal_access_sale_order > Select > The selected access right will appear inside Access Right Tab > Click on it > Grant different permissions in the pop-up |   |
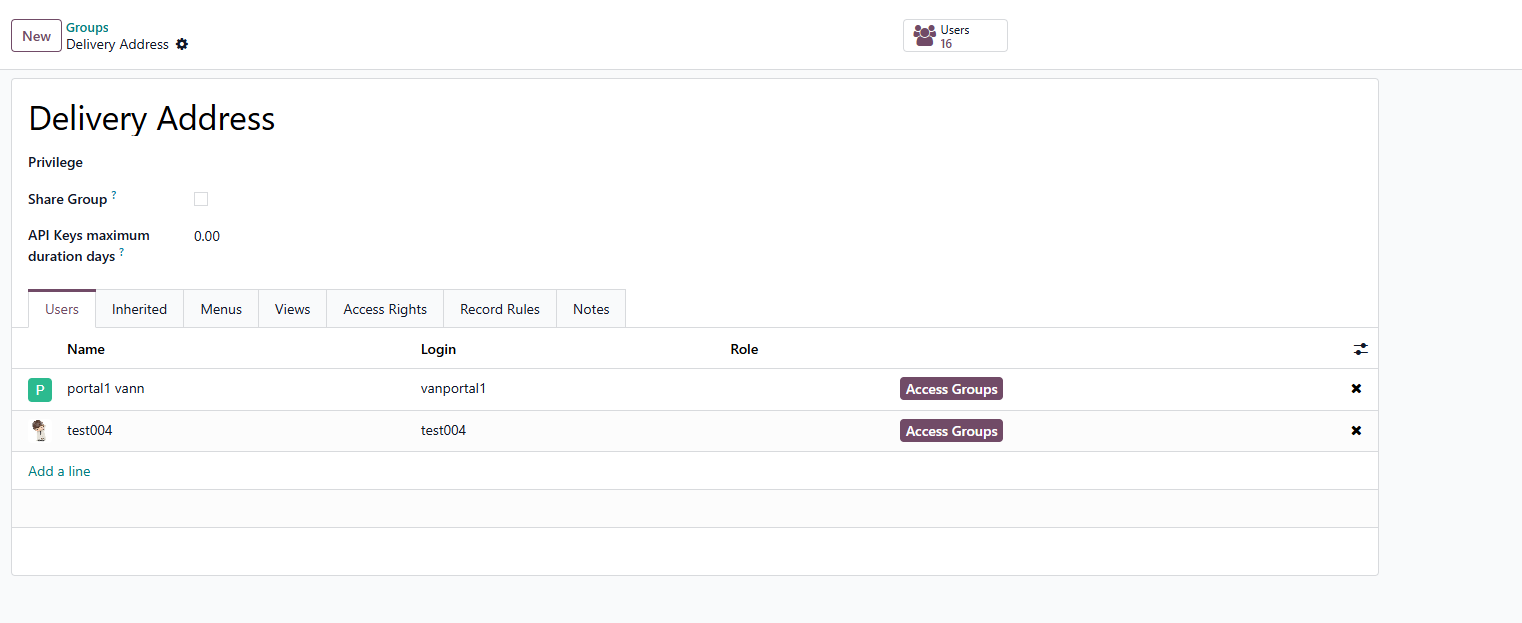
From v19: For Delivery Address & Invoice Address
|  |
6. Invoice AddressClick on Add a line > Search for the access right named fal_access_sale_order> Select > The selected access right will appear inside Access Right Tab > Click on it > Grant different permissions in the pop-up |   |
7. Delivery AddressClick on Add a line > Search for the access right named fal_access_sale_order > Select > The selected access right will appear inside Access Right Tab > Click on it > Grant different permissions in the pop-up Note: If each portal group needs different permissions, they must use different access rights. If we use the same access right, all groups will have the same permissions. Example: Delivery Address, Invoice Address, and Customer Reference all use fal_access_sale_order, so they have the same access. To give them different access, we must create or select a new access right and assign it to the correct model and Portal Role |   |